
LASER DaSH-IT · STEP BY STEP
Process a Photo for Wood
Prepare the image for your actual wood, prove the result, and save the successful version.
Screens captured from the current v1.8 development software. Feature names and availability may differ in the latest public installer. Screenshots illustrate software operation; they are not photographs of finished physical work. Updated October 14, 2026.
STEP 01 / 06
Load the photo and set the material
Open or change your photo in Guided View. At What will you engrave this photo on?, select Wood and choose Use This Material. To revisit this later, use Change setup → Change Material. Use Change Machine / Lens when the hardware context is wrong.
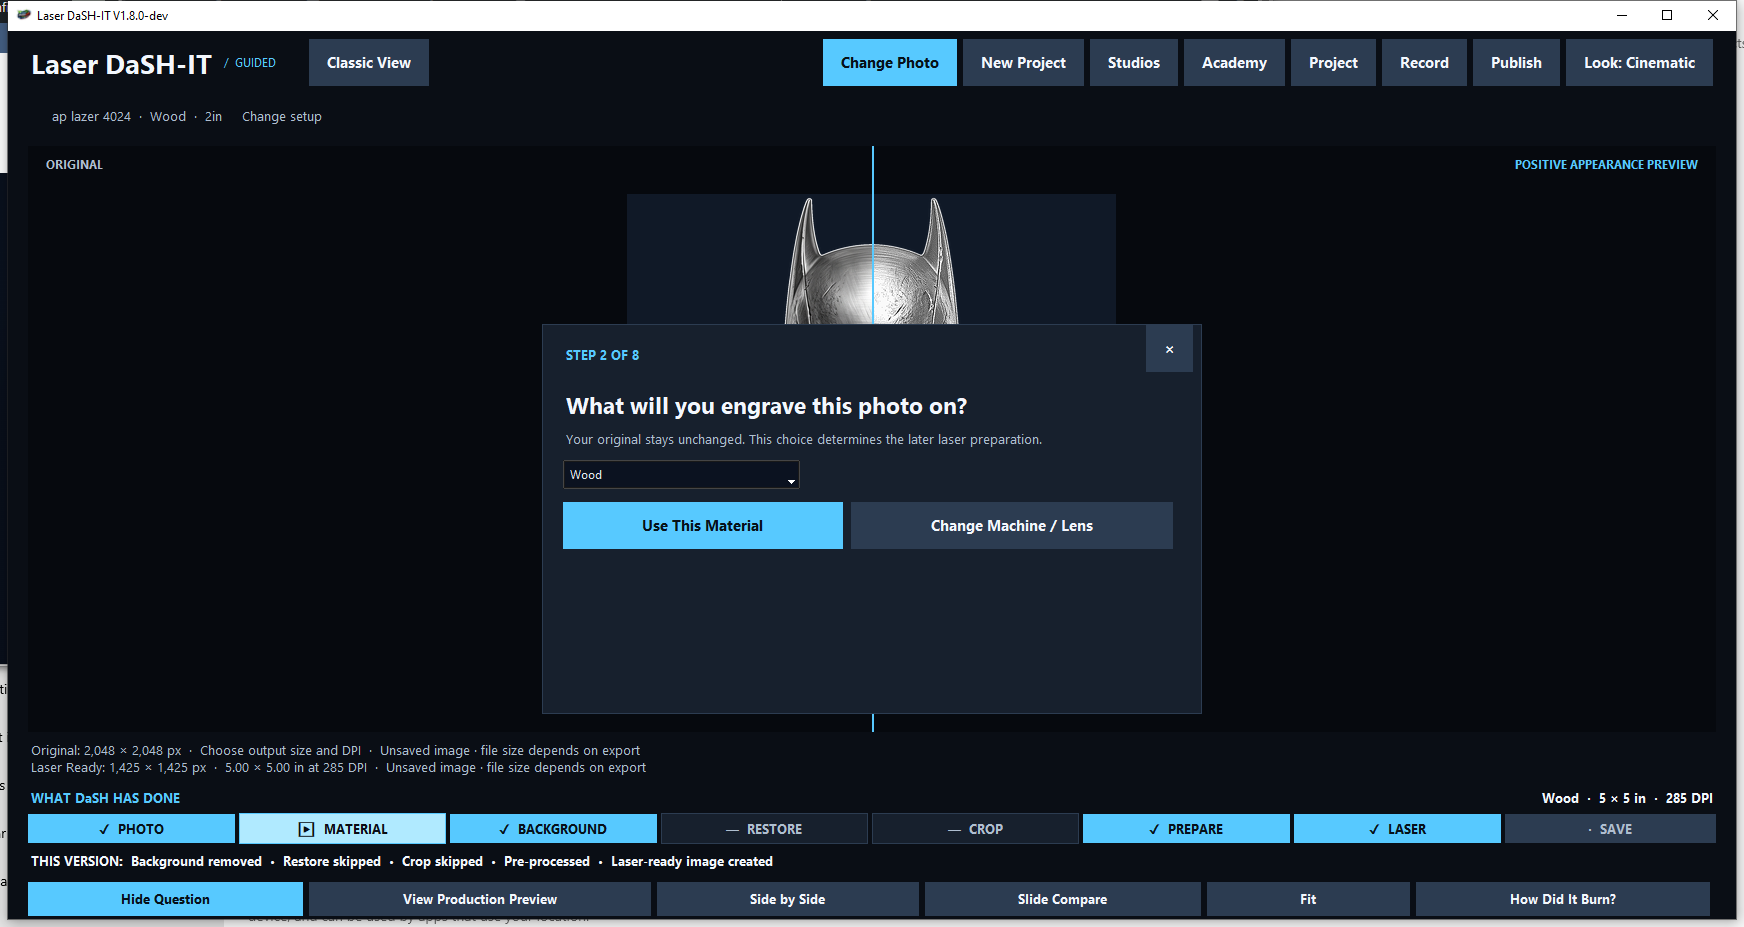
Checkpoint: The job header identifies Wood and the machine/lens you will actually use.
STEP 02 / 06
Prepare the image deliberately
Follow Background, Restore and Crop as the photo needs, then complete Prepare. Keep the original source intact. Set the final physical dimensions and intended resolution. Compare the source with the prepared image; preserve the subject’s face and important highlight/shadow separation.
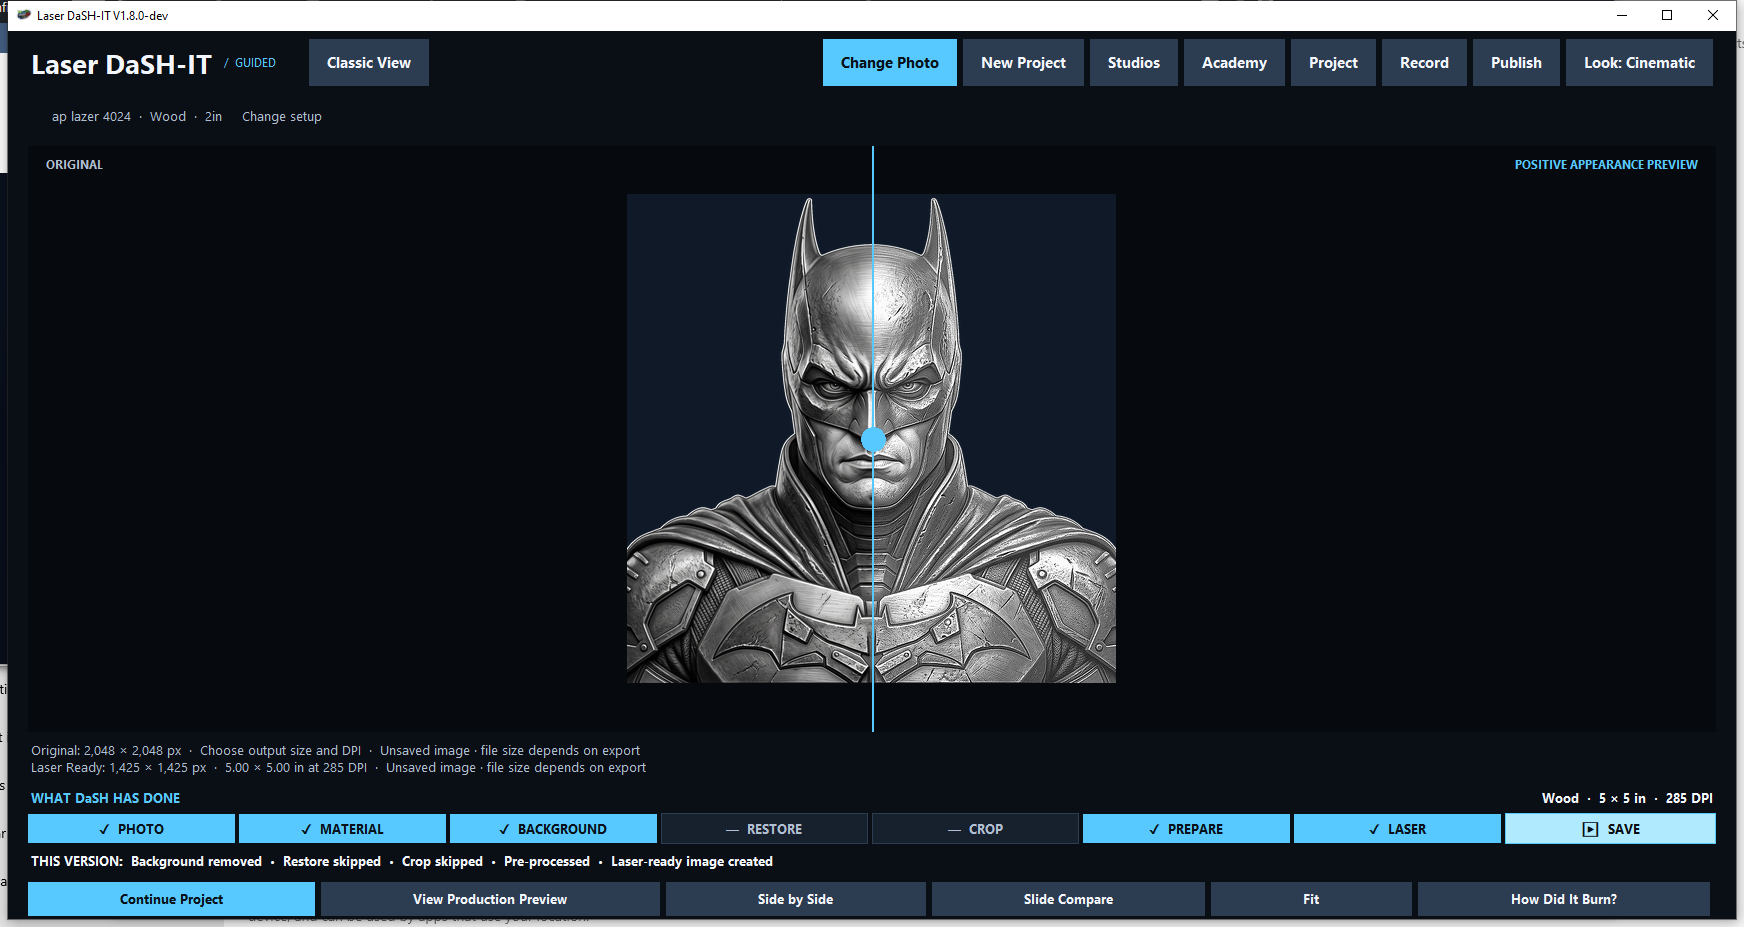
Checkpoint: The framing matches the blank and the subject remains readable at the intended size.
STEP 03 / 06
Review the laser recipe
Open the Laser step. Review the selected engine, screening method, resolution and tonal controls. Use a suitable normal recipe for your first wood proof. The pictured studio shows Detail Alchemy — Granite to Wood (Experimental) from an existing development test; its Gamma 0.80 and other values are an illustration of the controls, not a recommended wood recipe.
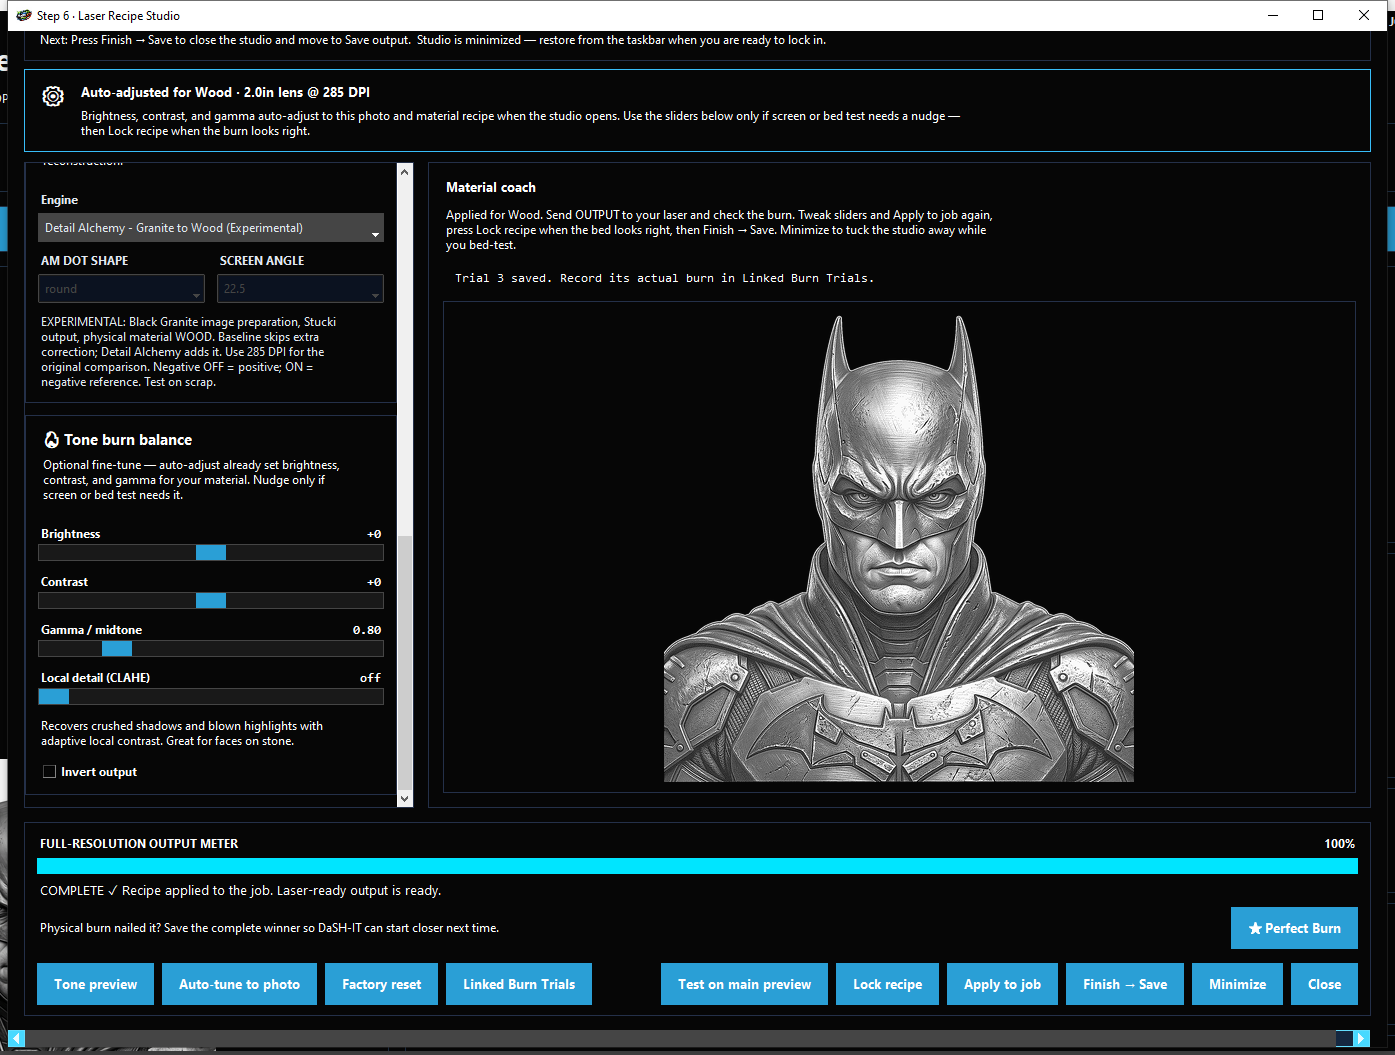
Checkpoint: You know which engine is active and whether it is experimental. No screenshot values have been copied blindly.
STEP 04 / 06
Make a controlled proof
Apply the recipe to the job and export the exact output you intend to test. Use a small representative section containing light, middle and dark tones. In the receiving laser software, verify dimensions, orientation, polarity and image mode. Avoid screening an already dithered file a second time. Use settings established for your own machine and material.
Checkpoint: The test file and its recorded settings represent the real job.
STEP 05 / 06
Adjust from the physical result
Inspect the cooled, cleaned proof under consistent light. If shadows merge, examine the source separation and tonal recipe. If fine detail disappears, check focus, resolution, grain and excessive energy before sharpening harder. Change one variable, reapply and create a new trial so the two outcomes can be compared.
Checkpoint: The improvement is visible on the material, not only in the on-screen preview.
STEP 06 / 06
Save the winner and record what happened
When the proof is right, use Lock recipe, then Finish → Save. In Linked Burn Trials or How Did It Burn, attach the actual outcome to the version you burned and record actual speed, power and passes. Reserve Perfect Burn for a real successful burn. Save the project and exported file together.
Checkpoint: The winning file, recipe, setup and physical feedback agree.