
LASER DaSH-IT · STEP BY STEP
Calibration and Linked Burn Trials
Find what the physical setup can reproduce, then link every result to the image version that produced it.
Screens captured from the current v1.8 development software. Feature names and availability may differ in the latest public installer. Screenshots illustrate software operation; they are not photographs of finished physical work. Updated October 14, 2026.
STEP 01 / 06
Confirm the setup before testing
Set material, machine, optic and intended resolution. Open Studios → Calibration or enter through Load + Open Calibration Lab in Donor Library. Calibration belongs to the physical conditions of the run. A different lens, material finish or resolution can require a new proof.
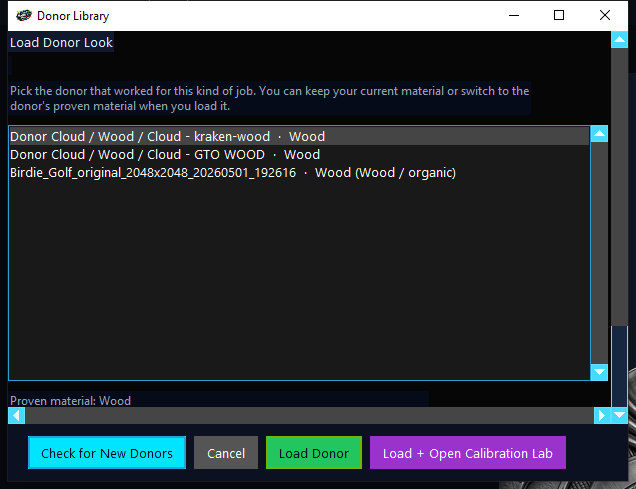
Checkpoint: The test represents the final material and hardware.
STEP 02 / 06
Establish useful resolution and tones
Use the lab’s DPI test and grayscale/proof tools to compare the available choices. Where the lab offers a DPI test, settle that choice before judging the tonal proof. Burn the test on scrap and inspect the actual marks. The goal is usable separation and detail, not the highest number. A monitor can display tones that the material cannot reproduce.
Checkpoint: You have a physically observed basis for the chosen resolution and tonal range.
STEP 03 / 06
Select and return the winner
Compare the burned samples under consistent lighting, select the winning candidate and use the lab’s finalize/save or return-to-processing action for that build. Check the recipe in Laser Processing afterward. Process the image and reopen Intelligence to verify whether physical calibration was applied; read the status and reason.
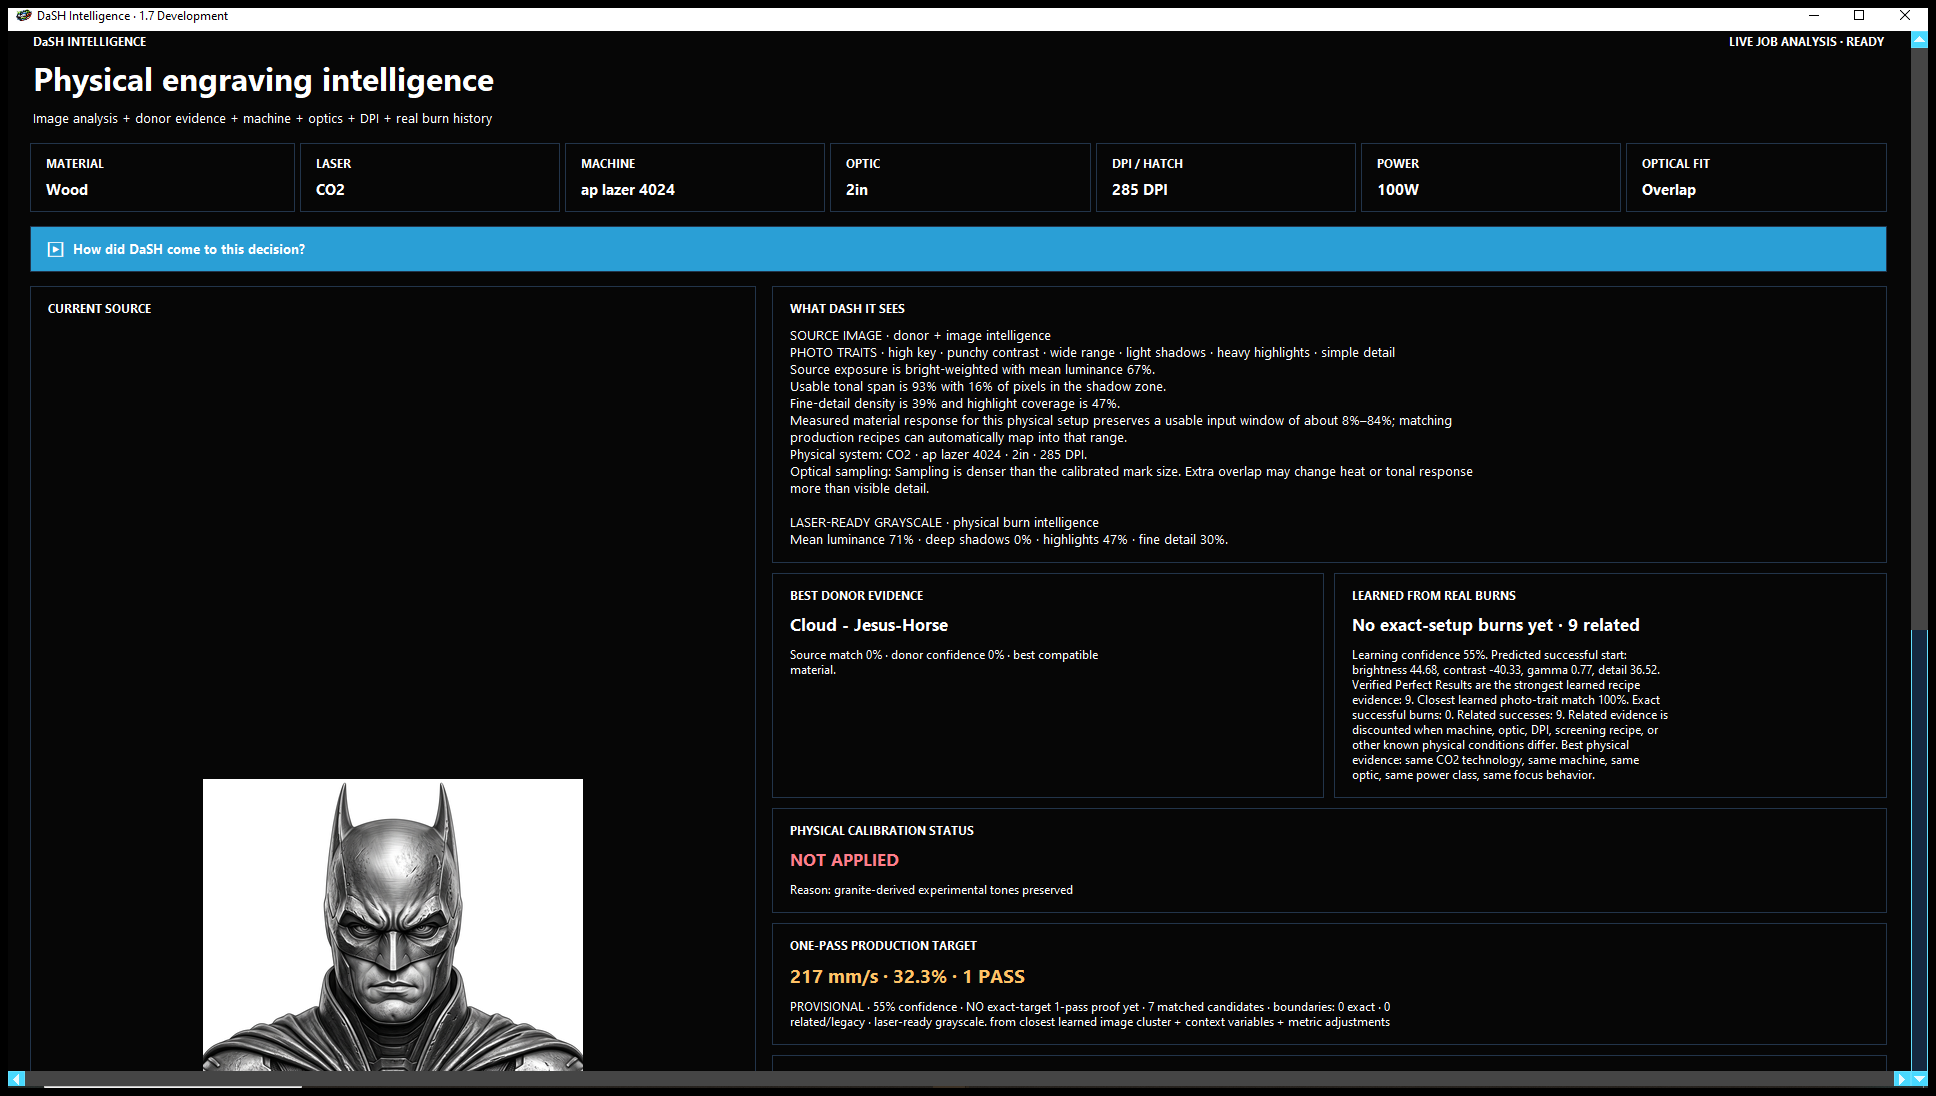
Checkpoint: The selected calibration is reflected in the current processing path, or the report clearly explains why it is not.
STEP 04 / 06
Create and preserve the test version
Apply the production recipe to the job. The current build saves linked processing trials with the donor baseline and final edits. Open Linked Burn Trials from the Recipe Studio. Export the exact version you will run and keep its filename connected to the trial number.
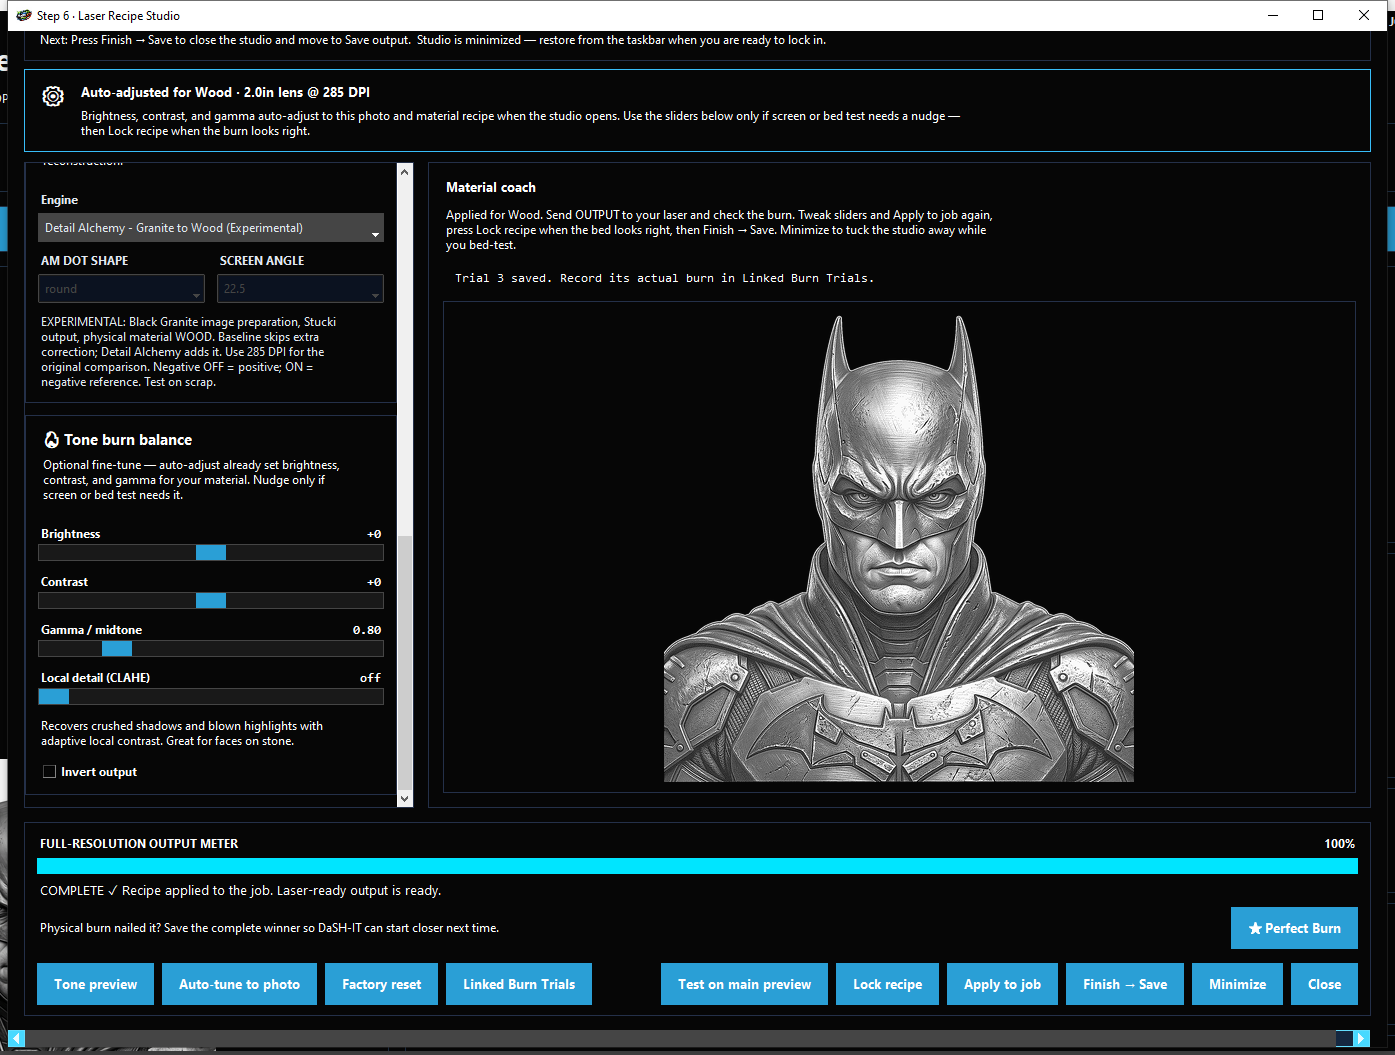
Checkpoint: The trial list contains the version you are about to test.
STEP 05 / 06
Record the real outcome on the correct trial
In Linked Burn Trials select the version you physically burned and use its record-result action. Enter Actual speed (mm/s), Actual power (%) and Actual passes, then choose the observed outcome. Use the same units as the form. Confirm physical feedback only after running the sample.
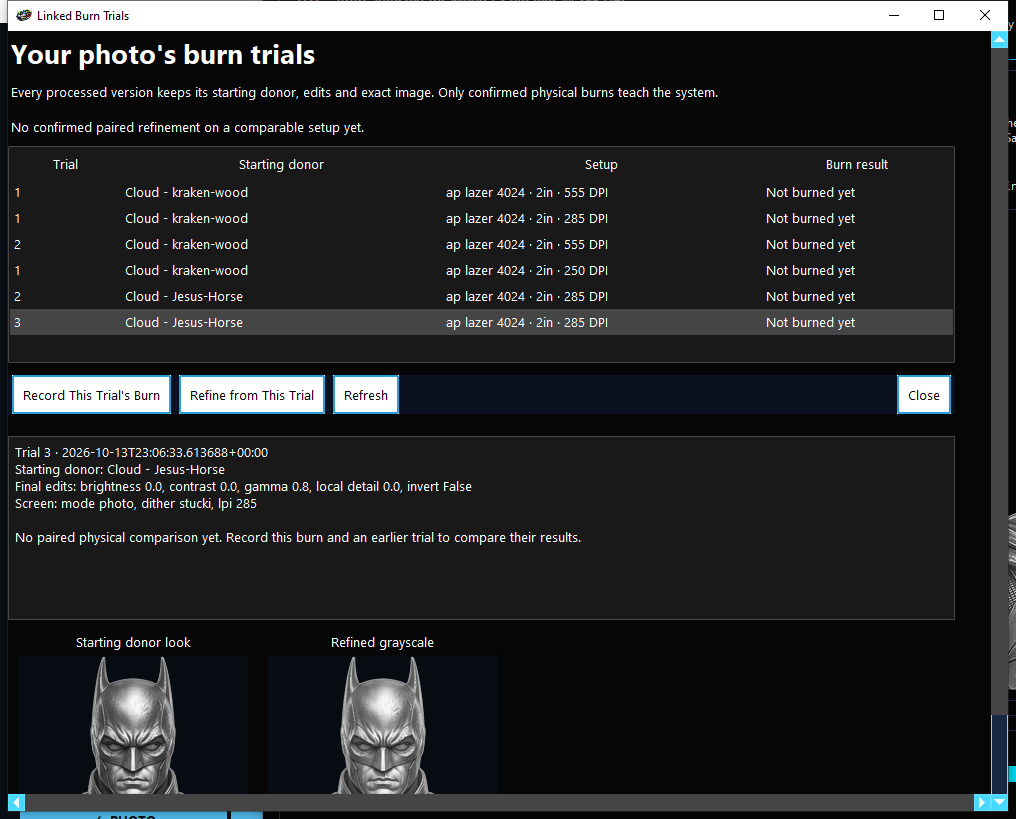
Checkpoint: The result belongs to the correct trial rather than whichever preview happens to be open.
STEP 06 / 06
Compare revisions, then save the production winner
If the test is too dark, loses highlights or closes shadows, change one cause and create another processed trial. Burn it and record that outcome too. Review the starting donor look, refined grayscale and paired comparison. Once the real result is right, lock the recipe and save the project, winning export and actual settings.
Checkpoint: The successful production starting point is documented and repeatable.