
LASER DaSH-IT · STEP BY STEP
Create a Multi-Panel Job
Divide one picture into ordered pieces and keep the dimensions, recipe and assembly plan connected.
Screens captured from the current v1.8 development software. Feature names and availability may differ in the latest public installer. Screenshots illustrate software operation; they are not photographs of finished physical work. Updated October 14, 2026.
STEP 01 / 07
Open Multi-Panel and choose a layout
Choose Studios → Multi-Panel. At Question 1 select an arrangement such as Square Mosaic, or Custom for your own rows and columns. Square Mosaic is 3 across × 3 down. Confirm that you really want separate physical pieces before continuing.
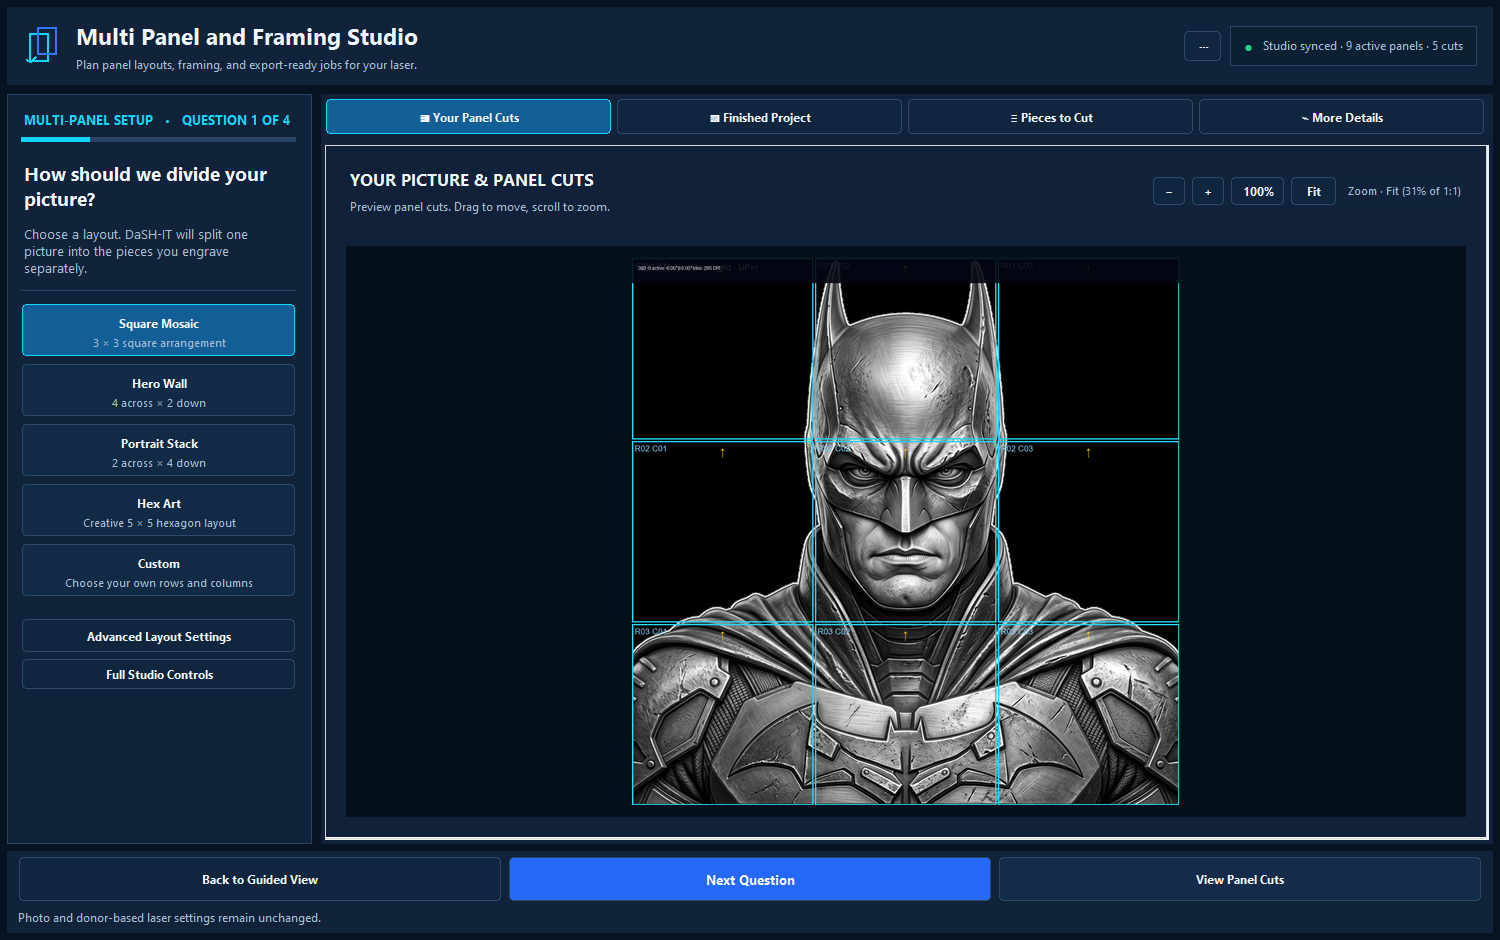
Checkpoint: The preview and selected layout agree on the number and order of pieces.
STEP 02 / 07
Enter the size of one piece
Click Next Question. Enter the width and height of one panel in inches, not the total wall size. Choose touching pieces or a gap. The example’s 8 × 10 inch pieces are for demonstration. Read the calculated finished size; gaps contribute to the footprint.
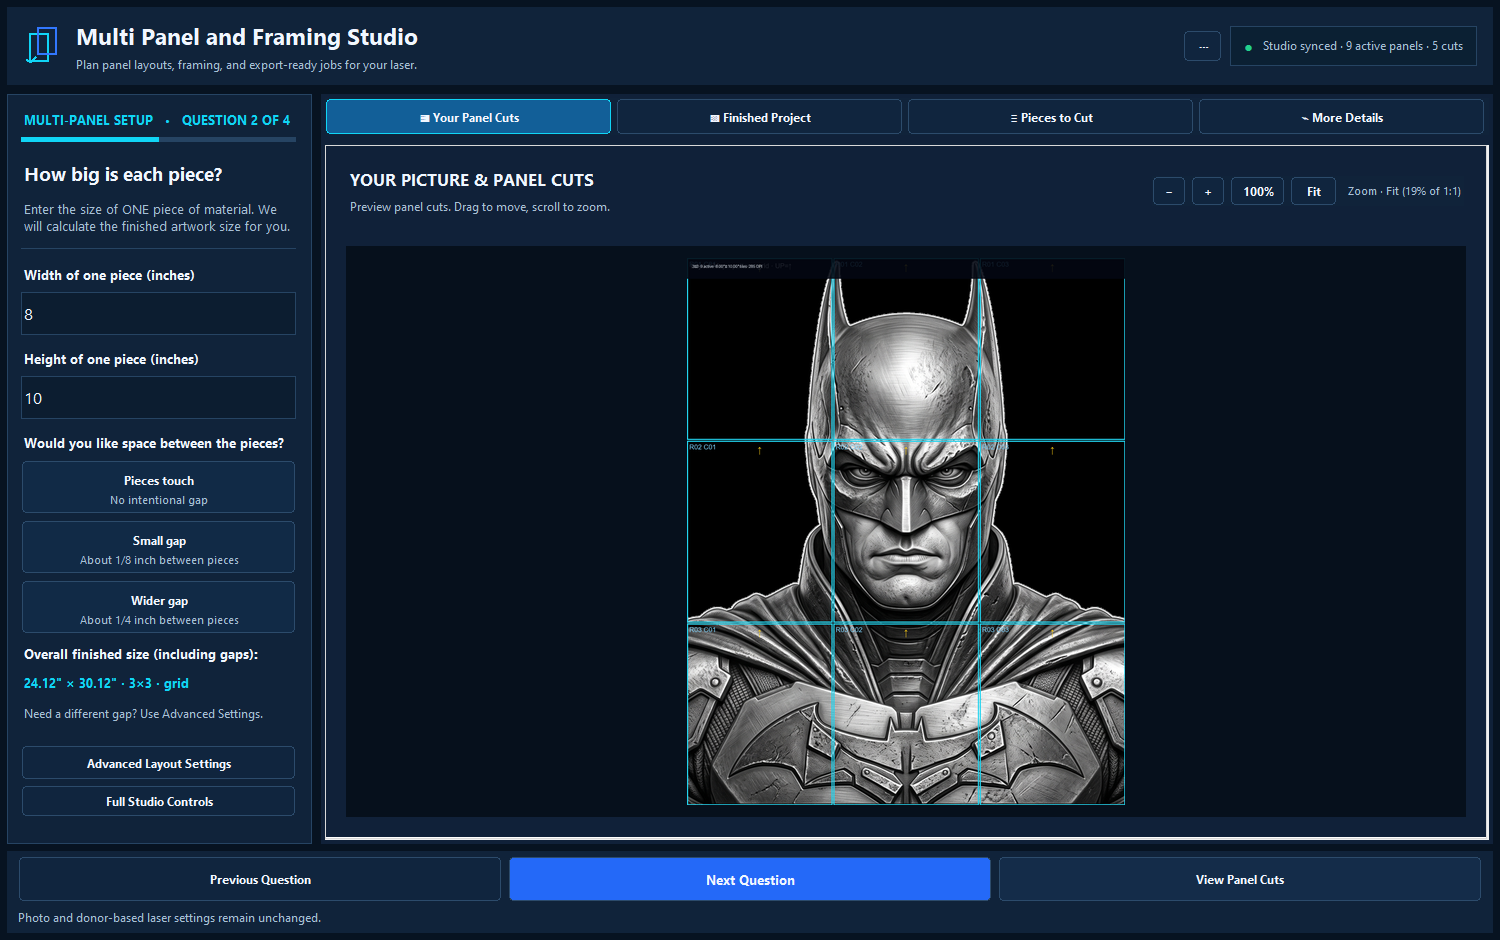
Checkpoint: The per-piece size matches your stock and the overall size fits the display space.
STEP 03 / 07
Choose a display or defer it
Next choose Gallery, Floating, Shadowbox or another frame preset, or Decide later. Use See Finished Project to inspect the presentation. A frame selection does not establish laser settings. For stock dimensions, joins and supports, continue with the dedicated framing lesson.
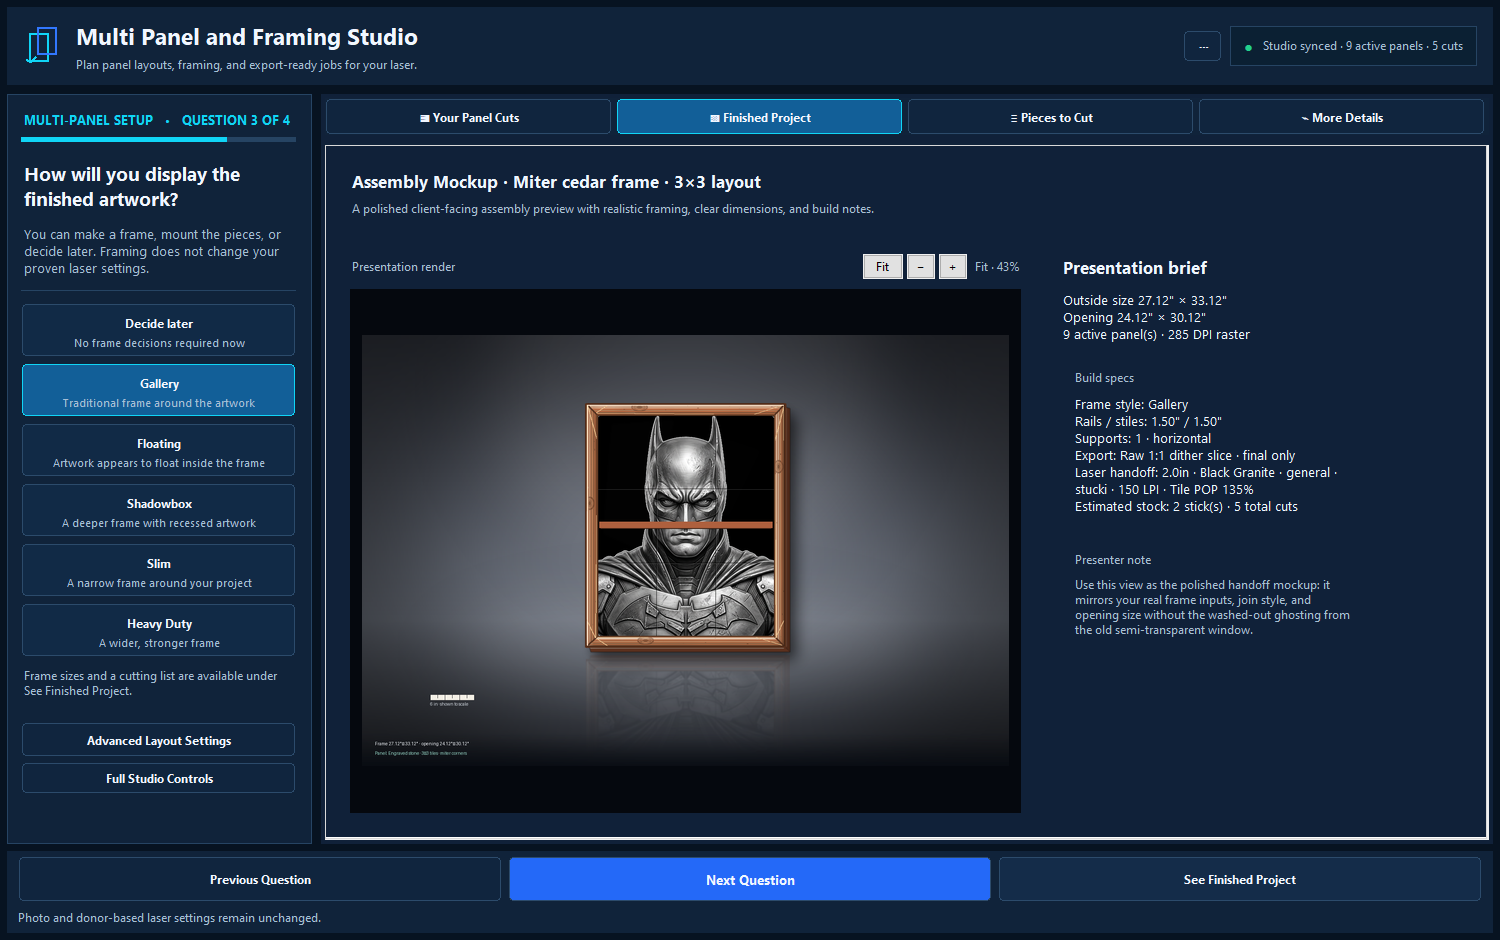
Checkpoint: The assembly concept suits how you will mount the finished panels.
STEP 04 / 07
Review the complete setup
At Question 4 check piece count, per-piece dimensions, rows/columns, finished size, frame and laser context. Inspect View Panel Cuts for important features near seams. Fill mode may crop the source; check eyes, faces and edge details before accepting the layout.
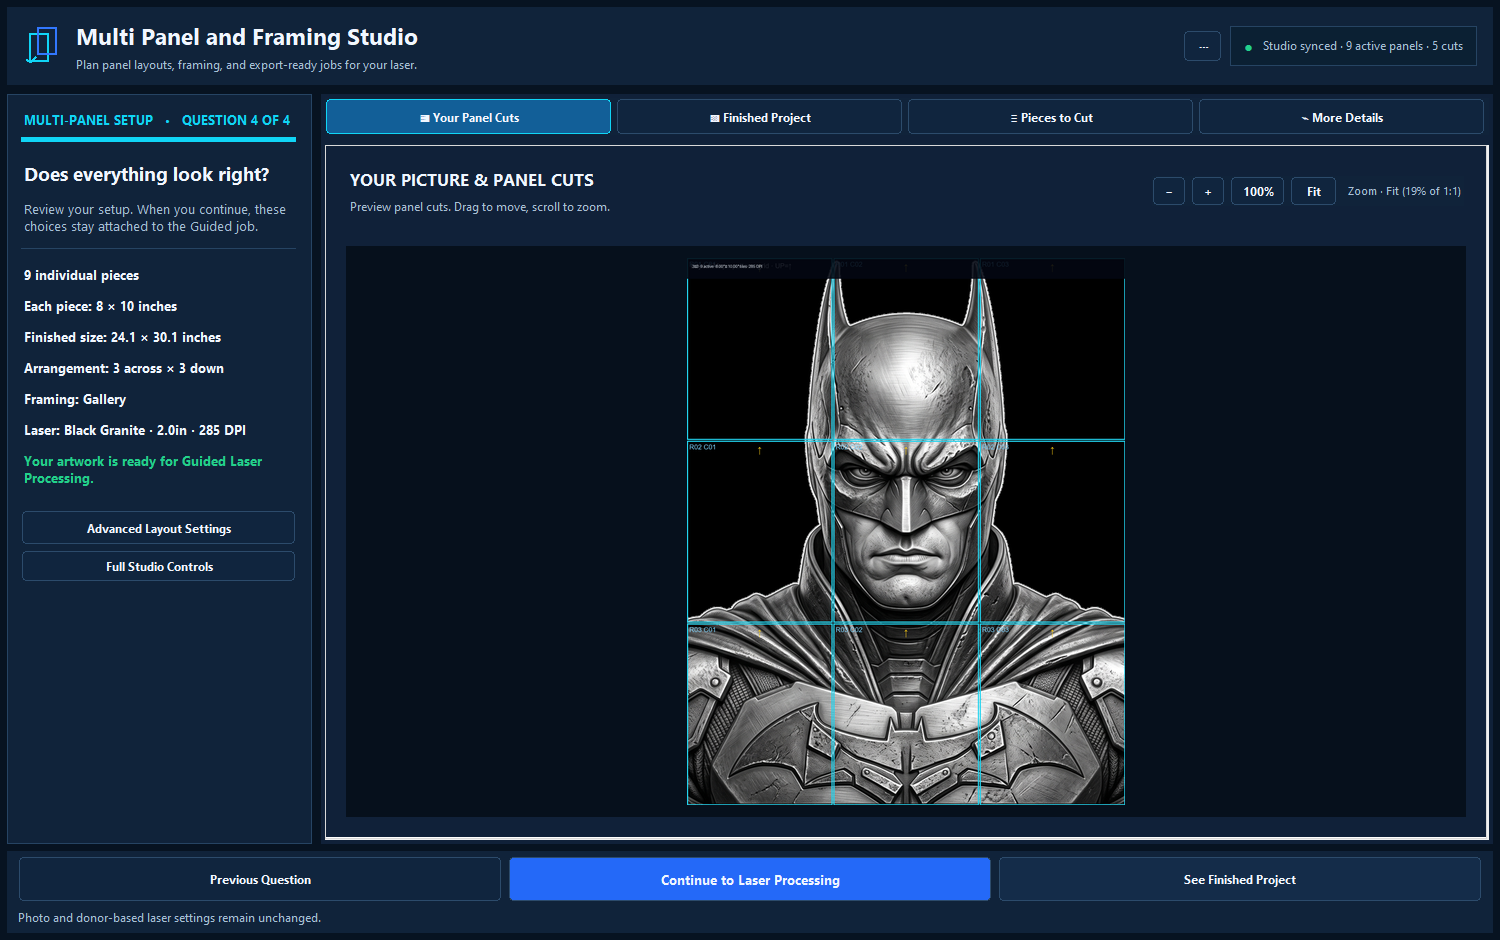
Checkpoint: The count and dimensions match the physical plan, and no unwanted crop remains.
STEP 05 / 07
Continue to Laser Processing and prove one representative panel
Click Continue to Laser Processing. Review the material, optic, DPI and recipe carried with the job. Make a representative panel proof before committing the full set. Keep one proven recipe across the set unless you deliberately document a change; inconsistent processing can create visible discontinuities.
Checkpoint: The layout and processing context describe the same project.
STEP 06 / 07
Export and audit the package
Use Export Multi-Panel Package from the full studio controls when the job is ready. Review the exported files, panel order and included instructions/metadata. Confirm a panel’s imported physical size in the receiving software. Keep panel IDs with the files and use removable back labels rather than burning IDs into visible artwork unless that is intended.
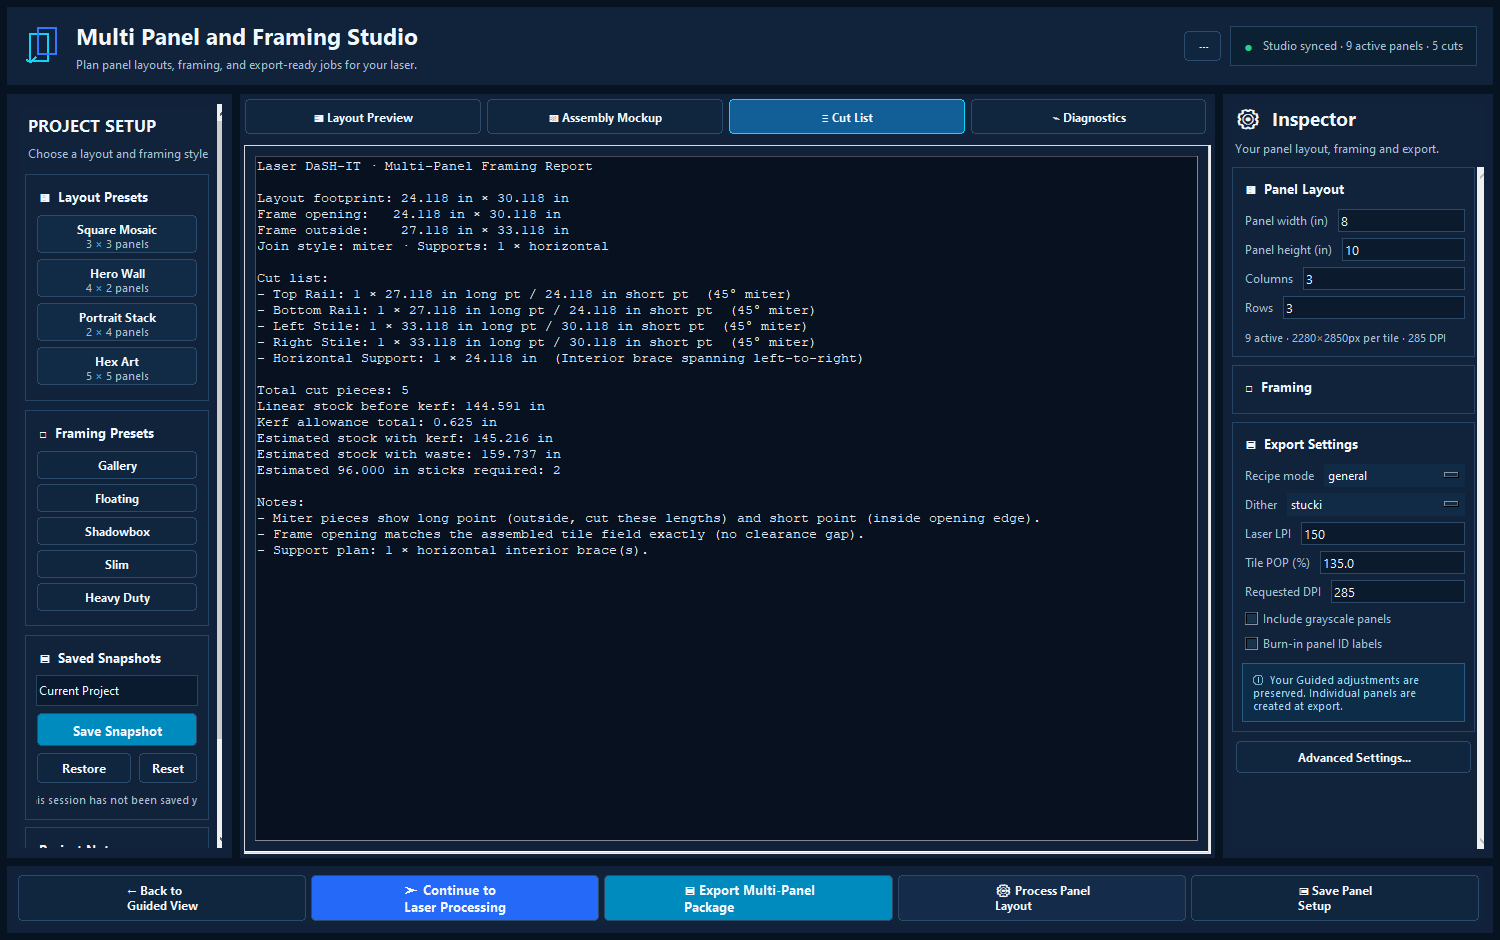
Checkpoint: Every exported panel can be matched to an assembly position.
STEP 07 / 07
Dry-lay the set before mounting
Arrange the physical pieces using the saved order and planned gaps. Check orientation, seam continuity and the total assembled size. Only then fit the frame or mounting system. Save the setup so a replacement panel can be reproduced later.
Checkpoint: The complete arrangement matches the plan before permanent assembly.