
LASER DaSH-IT · STEP BY STEP
DaSH Intelligence: Read the Evidence and Use It
Understand what DaSH sees, how it uses donors and burn history, and what to do with a provisional recommendation.
Screens captured from the current v1.8 development software. Feature names and availability may differ in the latest public installer. Screenshots illustrate software operation; they are not photographs of finished physical work. Updated October 14, 2026.
STEP 01 / 08
Open the report and check the setup
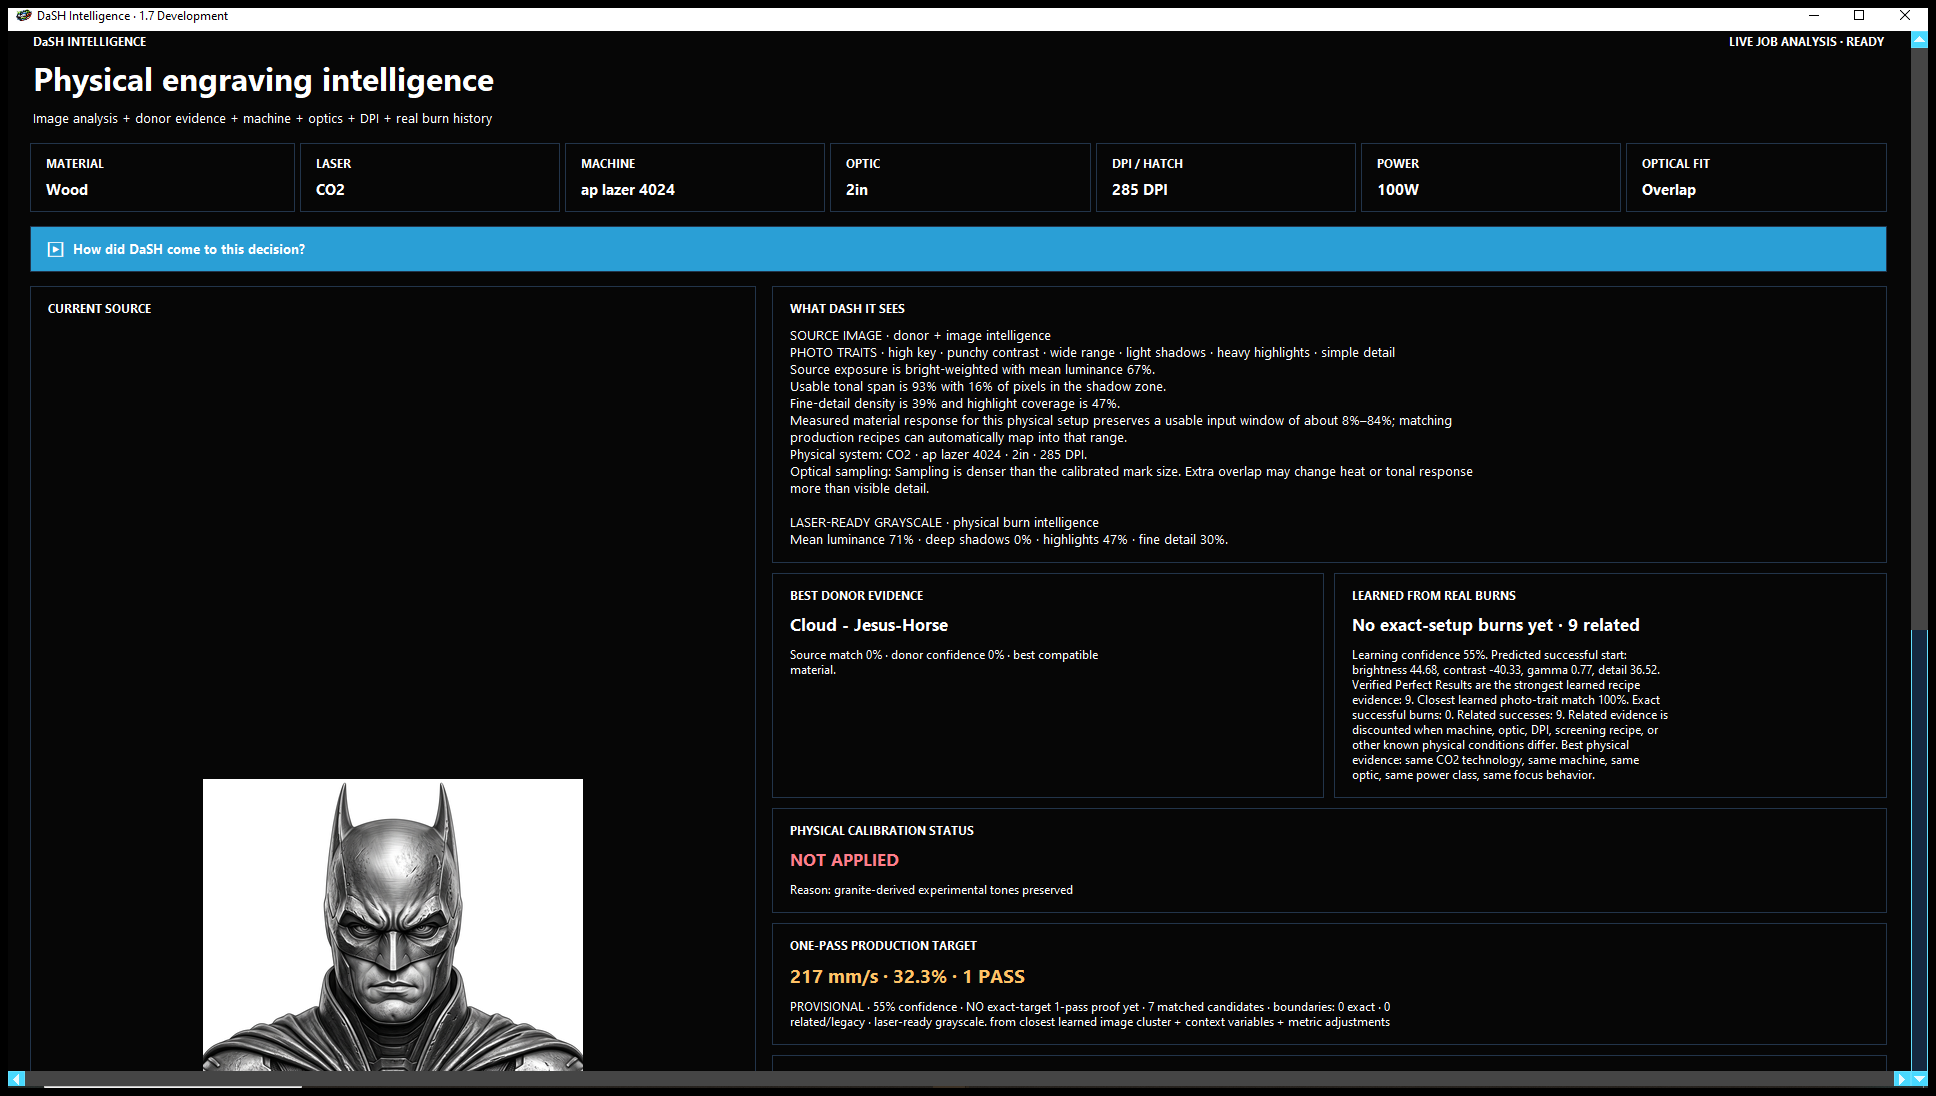
Choose Studios → Intelligence / Calibration. Read the top context strip: Material, Laser, Machine, Optic, DPI / Hatch, Power and Optical Fit. These describe the conditions used to interpret the image. A wrong machine or lens can make a plausible recommendation irrelevant.
Checkpoint: The context describes the machine and material you will actually run.
STEP 02 / 08
Read What DaSH IT Sees
This section describes traits such as brightness distribution, contrast, tonal span and fine-detail density. It can also discuss optical sampling and the laser-ready grayscale. These are image and setup observations. They help explain likely weaknesses; they are not a photograph of a finished burn.
Checkpoint: You can identify the main image problem the analysis is trying to address.
STEP 03 / 08
Separate donor evidence from burn history
Best donor evidence identifies a comparable saved reference. Learned from real burns describes recorded physical outcomes. A donor can offer a starting look without proving this exact photo. Related burns may differ in machine, optic, material, DPI or recipe. The screenshot explicitly says No exact-setup burns yet · 9 related; that is useful history with a limitation, not nine proofs of this exact job.
Checkpoint: You know whether the report has exact-setup evidence or only related evidence.
STEP 04 / 08
Check calibration status
Read Physical calibration status. In this example it says NOT APPLIED because experimental granite-derived tones were preserved. That message matters: do not assume that a stored tonal calibration was used simply because one exists. On a normal production route, process the image, then refresh or reopen Intelligence to check the status of the processed result.
Checkpoint: You know whether the current processed image used the physical tonal window and why.
STEP 05 / 08
Expand the plain-English explanation
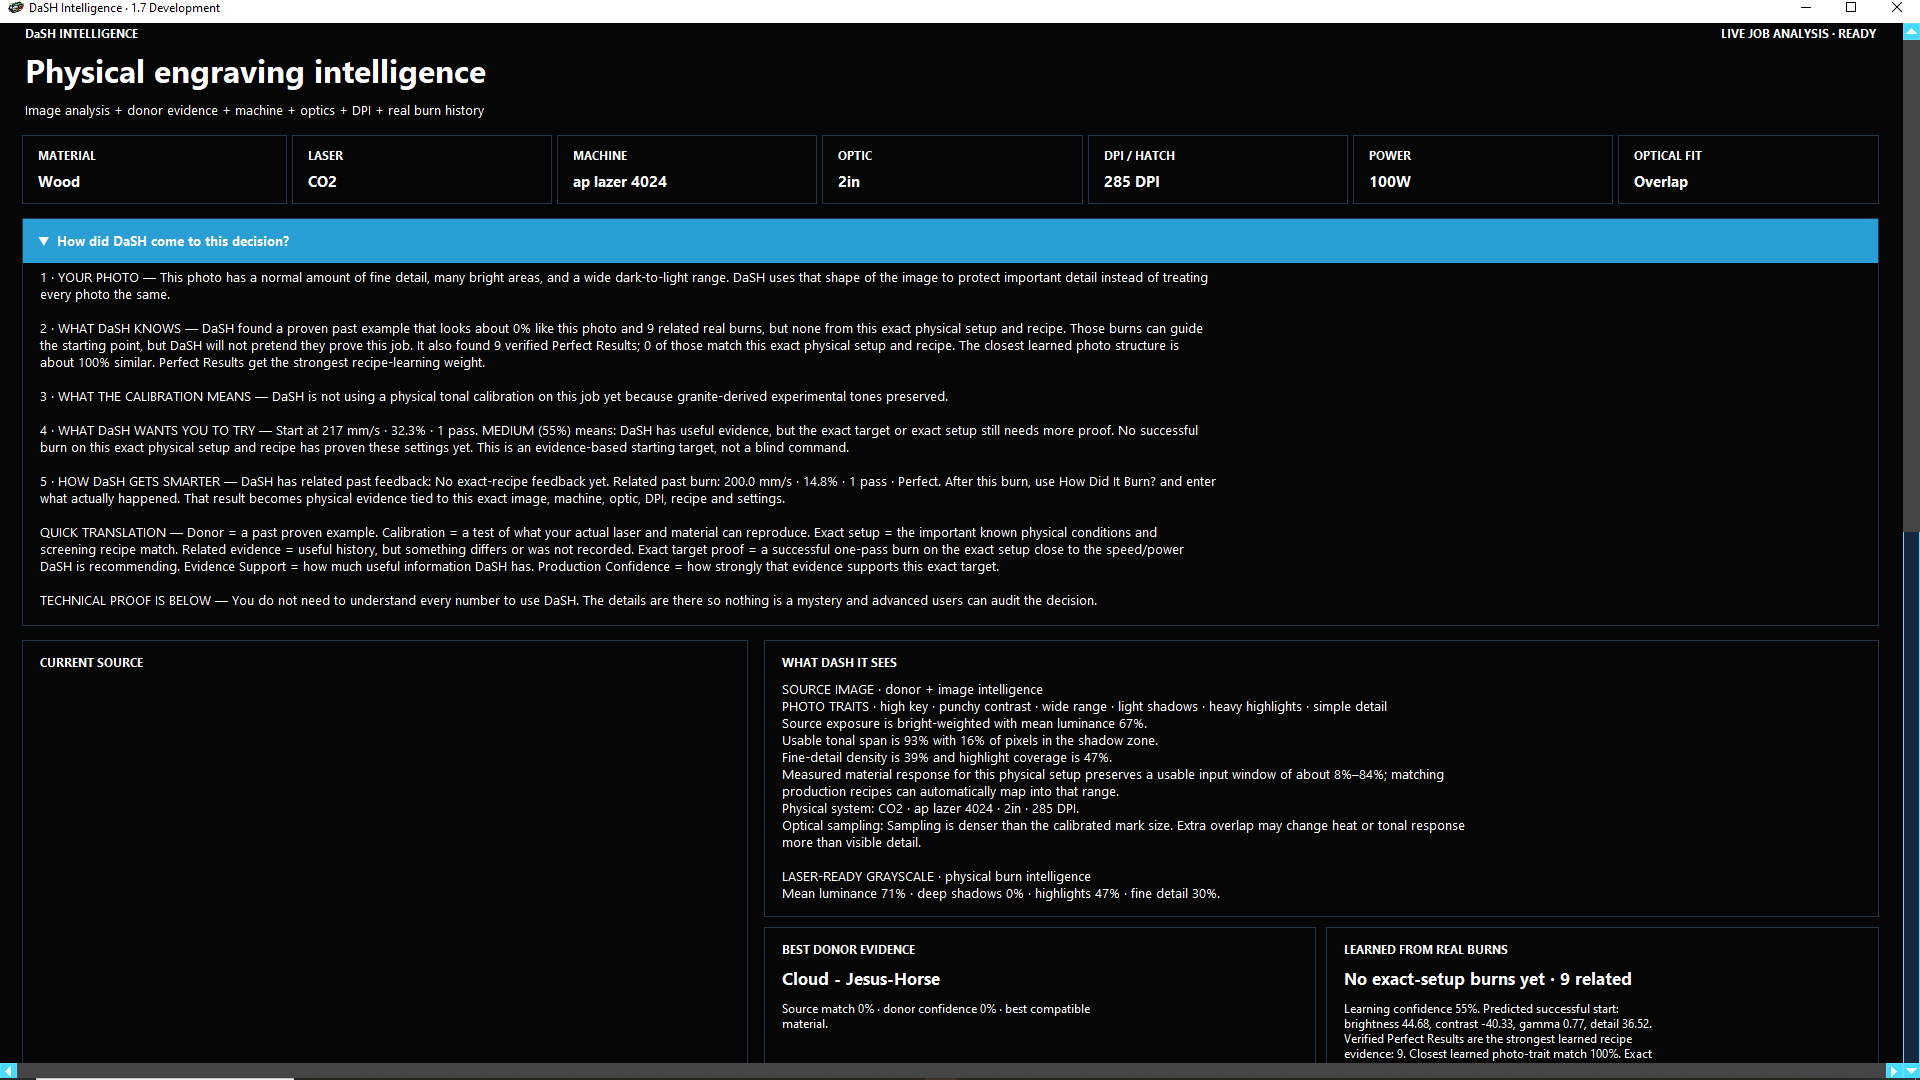
Click How did DaSH come to this decision?. Read the sections about your photo, what DaSH knows, calibration, what to try and how it learns. This connects the technical report to the next shop action. The example’s target is marked provisional and has no exact-target one-pass proof. Treat its numbers as that job’s proposed test, not universal settings.
Checkpoint: You can explain the recommendation and the missing evidence in your own words.
STEP 06 / 08
Use confidence correctly
Evidence support describes available information. Production confidence concerns how strongly that evidence supports the proposed target. Neither is a success guarantee or a direct measure of likeness. A strong image match can coexist with weak physical evidence. Inspect warnings about optics, overlap and predicted burn risks before making a test.
Checkpoint: You can distinguish a similar-looking image from a physically comparable proven run.
STEP 07 / 08
Test the proposed recipe and keep the version
Return to the recipe, review the recommendation and make a small representative physical proof. Keep the processed version and actual machine settings together. If the outcome needs adjustment, revise one cause, process a new version and test again. Do not mark a screen preview as a successful physical result.
Checkpoint: Each physical proof has a corresponding saved processing trial.
STEP 08 / 08
Tell DaSH what actually happened
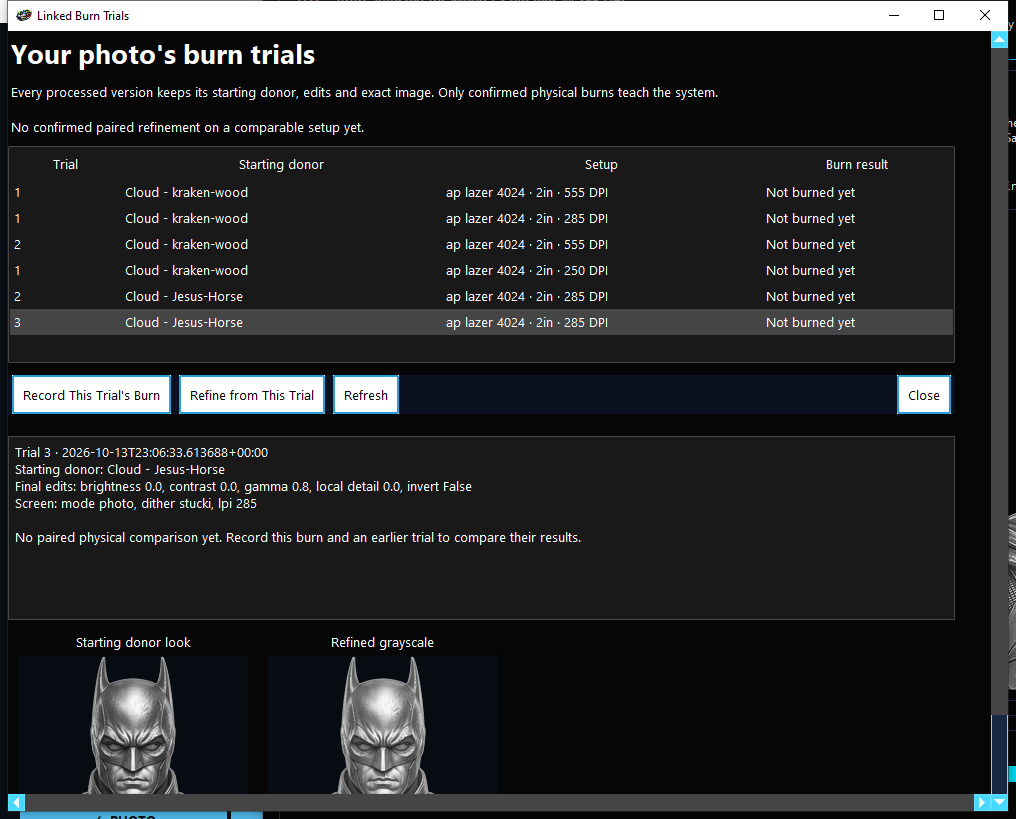
Open How Did It Burn? or Linked Burn Trials. Select the exact version, enter the actual settings and choose the observed outcome. Useful outcomes include Too dark, Shadows closed, Highlights lost and Fine detail lost, not only Perfect burn. Reopen the report after recording the result and review what changed. Learning is strongest when the saved evidence accurately describes the real run.
Checkpoint: Your feedback belongs to the image version, recipe and setup that produced the physical sample.