LASER DaSH-IT · STEP BY STEP
Create a Freeform Relief
Keep the artwork’s outline and build a relief with a defined physical size.
Screens captured from the current v1.8 development software. Feature names and availability may differ in the latest public installer. Screenshots illustrate software operation; they are not photographs of finished physical work. Updated October 14, 2026.
STEP 01 / 06
Choose the correct source
Open 3D Coin Builder from the Generator, then select your picture, prepared height map or existing 3D model. Inspect ORIGINAL and confirm that the complete subject is present. A picture supplies visual information; its depth must be estimated.
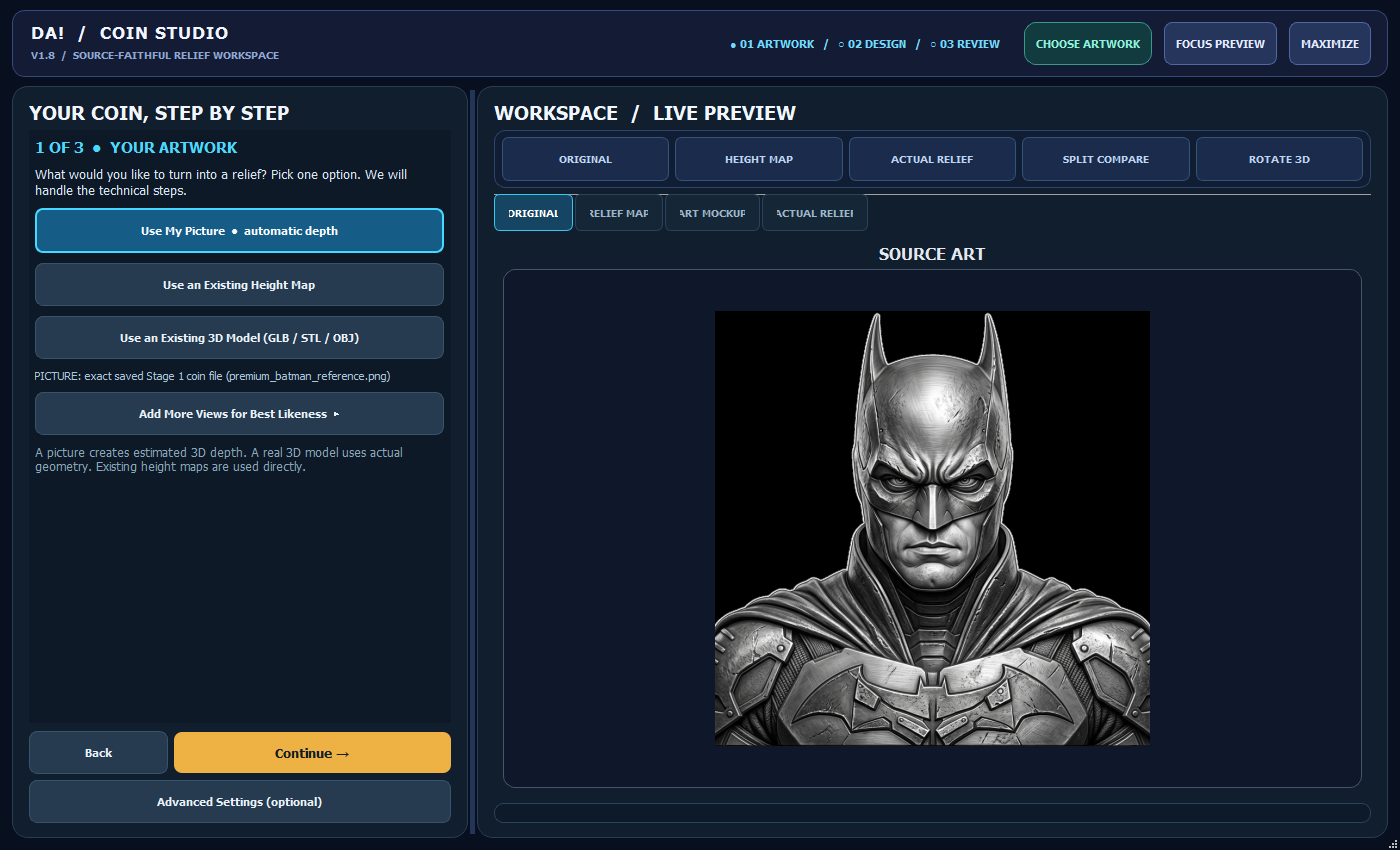
Checkpoint: The original subject and filename are correct.
STEP 02 / 06
Switch to Freeform relief
Continue to Size & Outline and check Freeform relief — keep the design outline. The workspace changes to the relief route. Set the Relief longest side in millimeters. Check the silhouette before proceeding; changing the size does not repair an unwanted background.
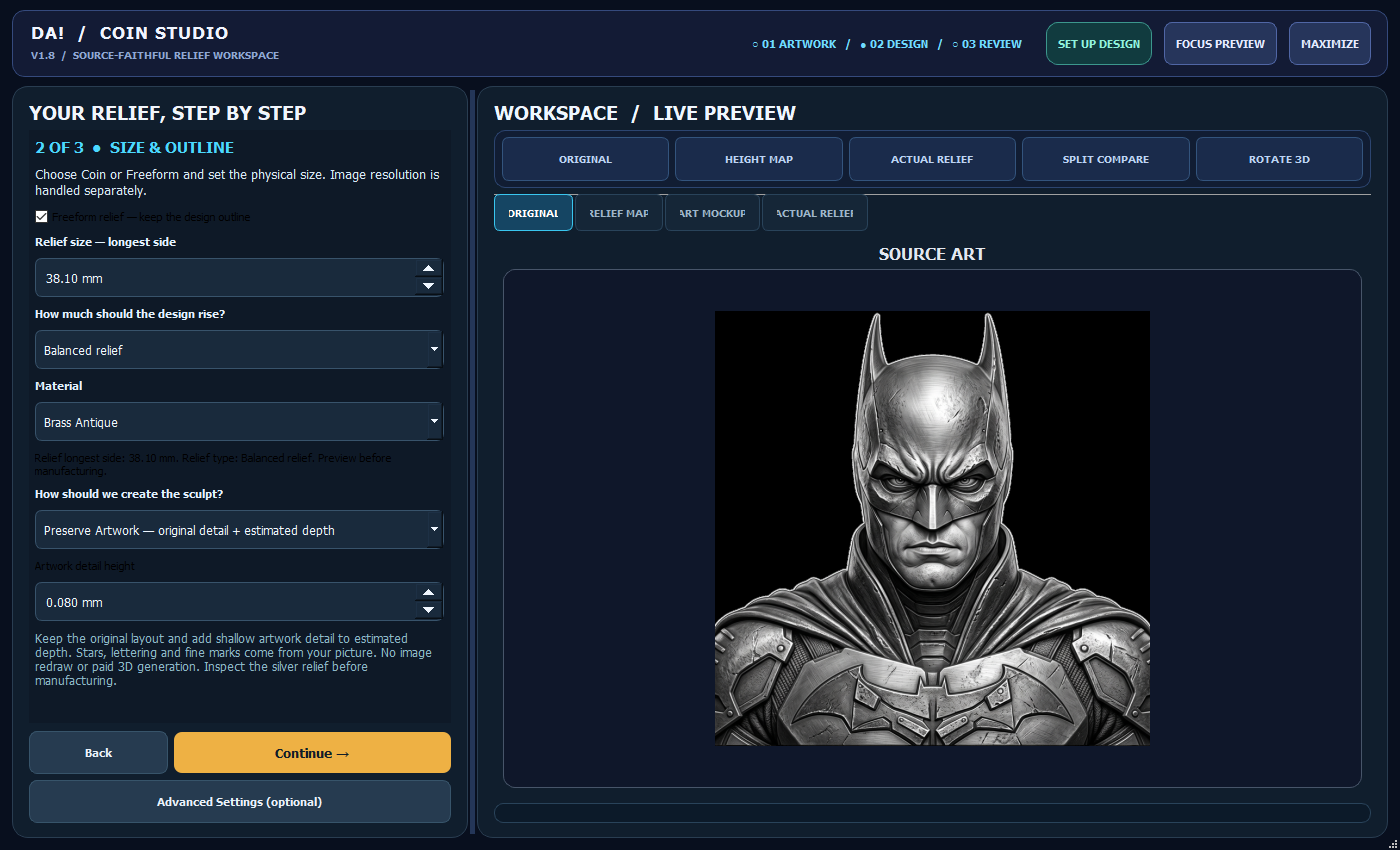
Checkpoint: The panel now says relief rather than coin, and the longest side matches your design.
STEP 03 / 06
Set the rise and artwork method
Choose the rise and material for your project. For a first comparison, keep the source-preserving route and use a modest rise. Go to Advanced Settings only when you need controls such as base thickness, smoothing or background treatment. Change one parameter at a time so you can identify its effect.
Checkpoint: The relief is physically appropriate for the stock and process you plan to use.
STEP 04 / 06
Review and build
Continue and read the source, longest-side dimension and selected method. Click Build My Relief. Allow the build to finish. The screen shown is the pre-build review, not a photograph of a manufactured piece.
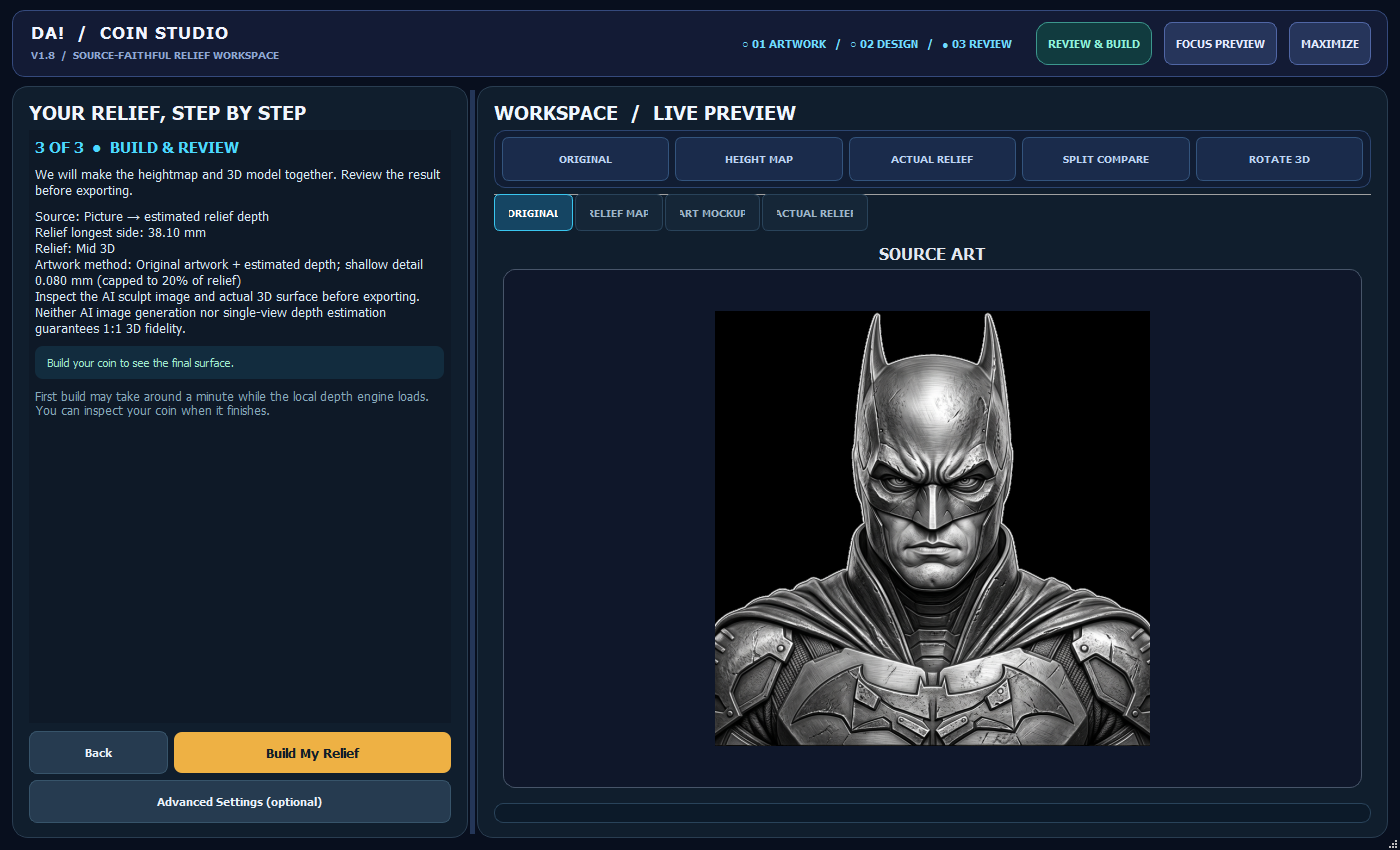
Checkpoint: The summary uses the freeform route and the intended physical dimension.
STEP 05 / 06
Check the surface, then export
Inspect RELIEF MAP and ACTUAL RELIEF, then rotate the 3D view. Look for abrupt height jumps, weak facial features, holes and unintended raised areas. Export the relief pack only after inspecting the actual surface. Check units and dimensions again after import into the destination program.
Checkpoint: The actual surface is suitable for a test and the imported dimensions agree.
STEP 06 / 06
Choose the right production route
A normal photo engraving and a relief machining job do different things. A dithered picture does not command a machine to carve a specified depth. For an engraving, continue through material processing and a physical proof. For geometry or depth-based production, use a compatible workflow in your receiving software and test its interpretation of height and depth.
Checkpoint: You can name the output file and the operation that will use it.