
LASER DaSH-IT · STEP BY STEP
Create a Coin from Your Artwork
Turn a picture into a physically sized coin relief, then inspect the surface before exporting.
Screens captured from the current v1.8 development software. Feature names and availability may differ in the latest public installer. Screenshots illustrate software operation; they are not photographs of finished physical work. Updated October 14, 2026.
STEP 01 / 06
Open Coin Studio and choose your source
From Studios → Generator, open 3D Coin Builder. In the guided coin workspace, choose Use My Picture • automatic depth and select your artwork. For a prepared depth image use Use an Existing Height Map; for actual geometry use Use an Existing 3D Model (GLB / STL / OBJ). These inputs mean different things: a photograph estimates depth, a height map supplies depth values, and a model supplies geometry.
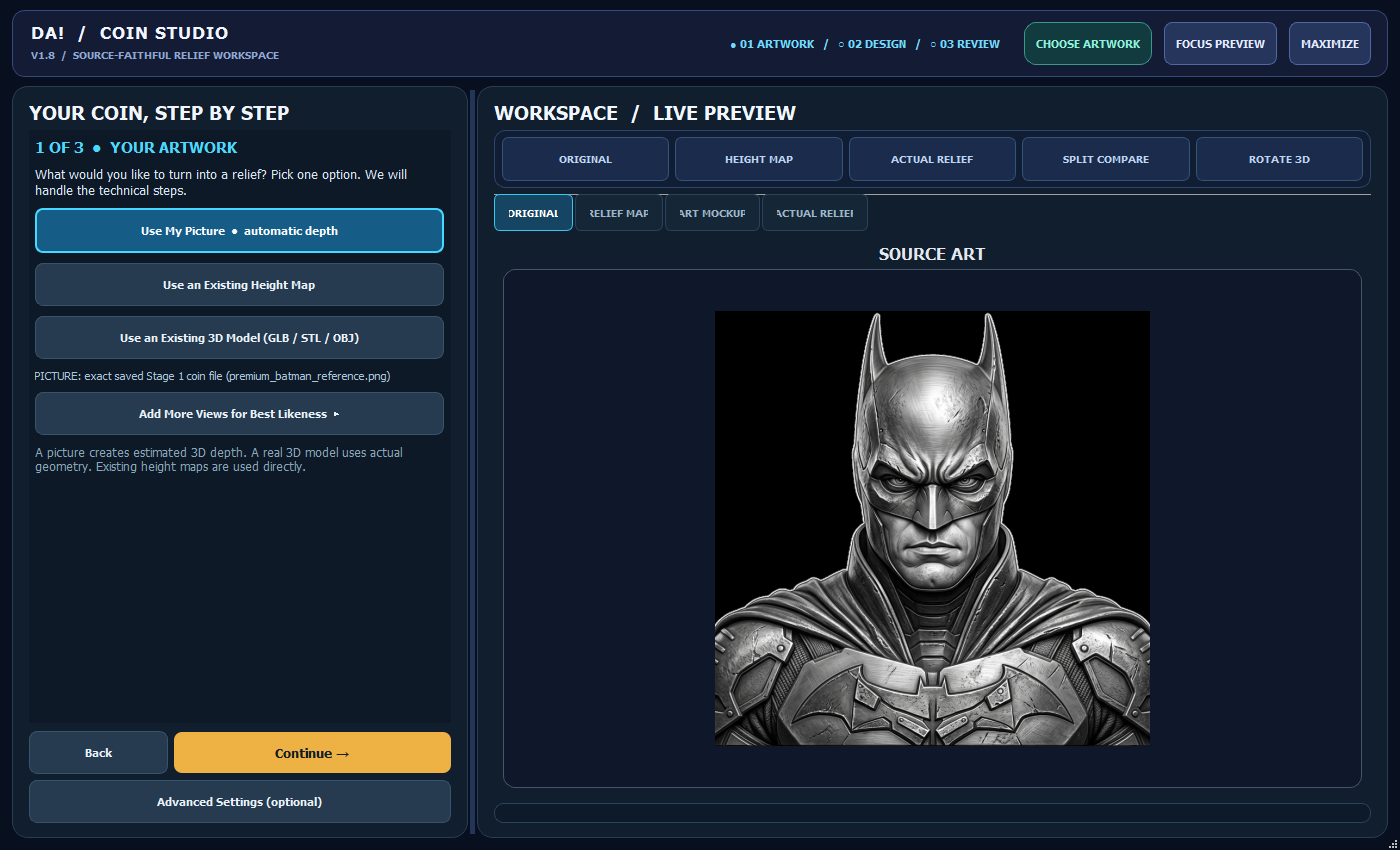
Checkpoint: Your source art appears under ORIGINAL. Confirm the filename and subject before Continue.
STEP 02 / 06
Set size, relief and material
Click Continue. Leave Freeform relief — keep the design outline unchecked for a round coin. Enter the measured Coin diameter in millimeters. The screenshot shows 38.10 mm as an example, not a required blank size. Choose how much the design should rise, then choose the intended material. Size in millimeters and image resolution are separate settings.
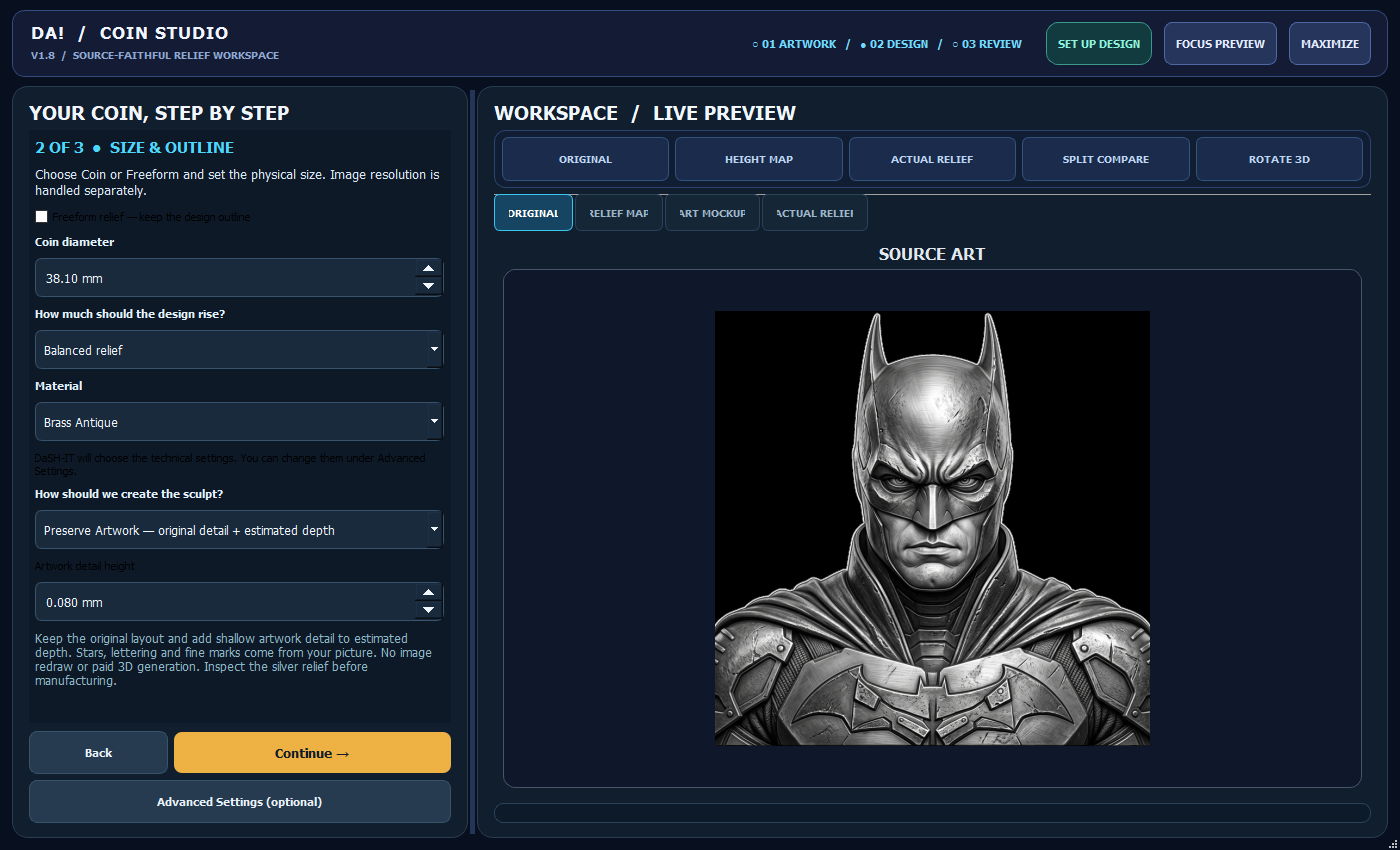
Checkpoint: The diameter matches your blank and the round coin route remains selected.
STEP 03 / 06
Choose how the sculpt is created
For a first attempt, use Preserve Artwork — original detail + estimated depth. It keeps the original visual detail and adds shallow detail to estimated depth. Other local or Premium choices can change the result. Premium AI routes require their own connection and any displayed charge authorization; use the on-screen terms for your build. For likeness work, review the source and extra reference views carefully. Extra photos do not guarantee exact likeness.
Checkpoint: Your method is intentional. You have not confused a rendered metallic picture with a measured 3D surface.
STEP 04 / 06
Review, then build
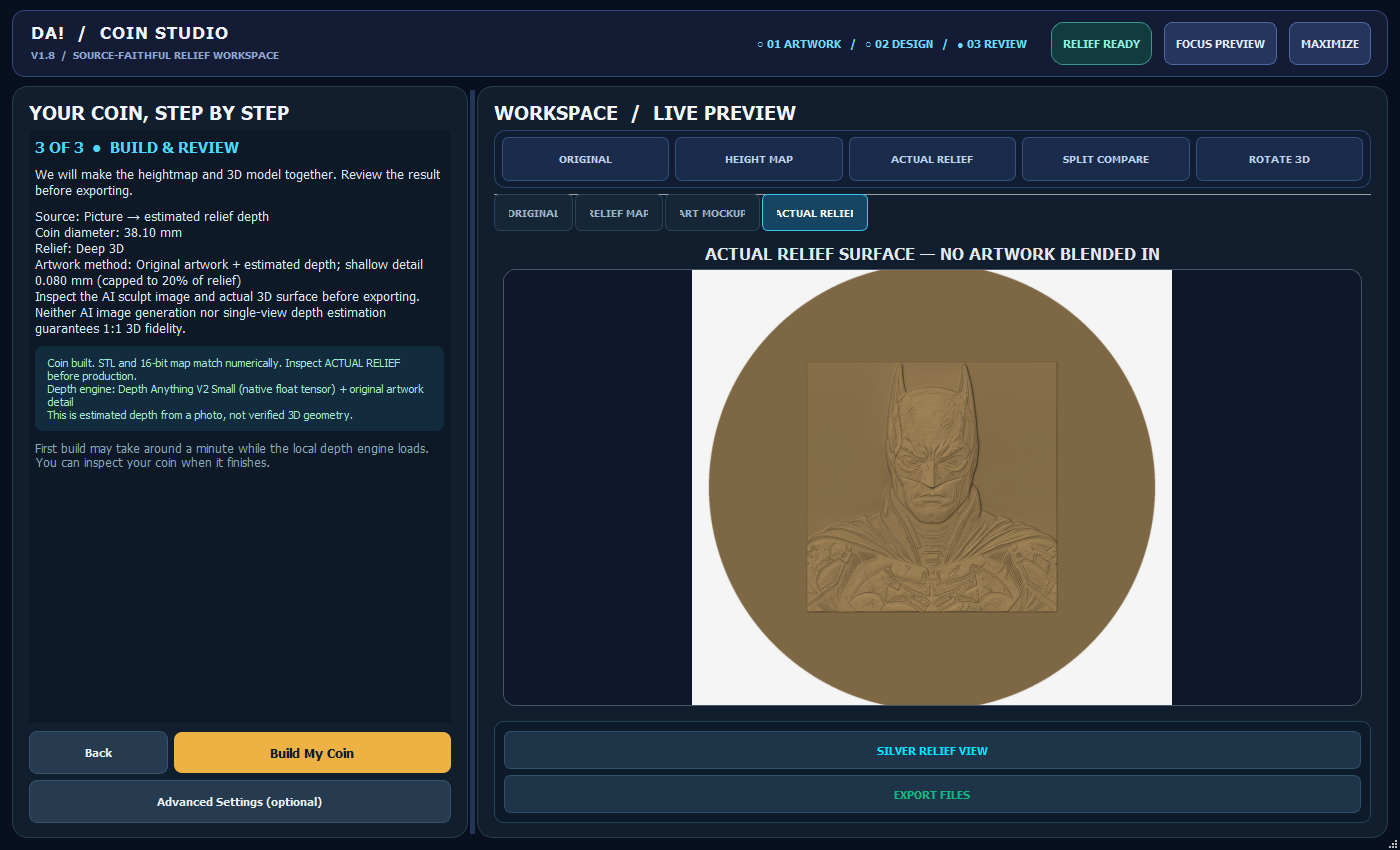
Click Continue to the review screen. Check source type, diameter, relief and artwork method. Use Back if any is wrong. Click Build My Coin when the review matches your intended output. Wait for the build to finish before judging or exporting.
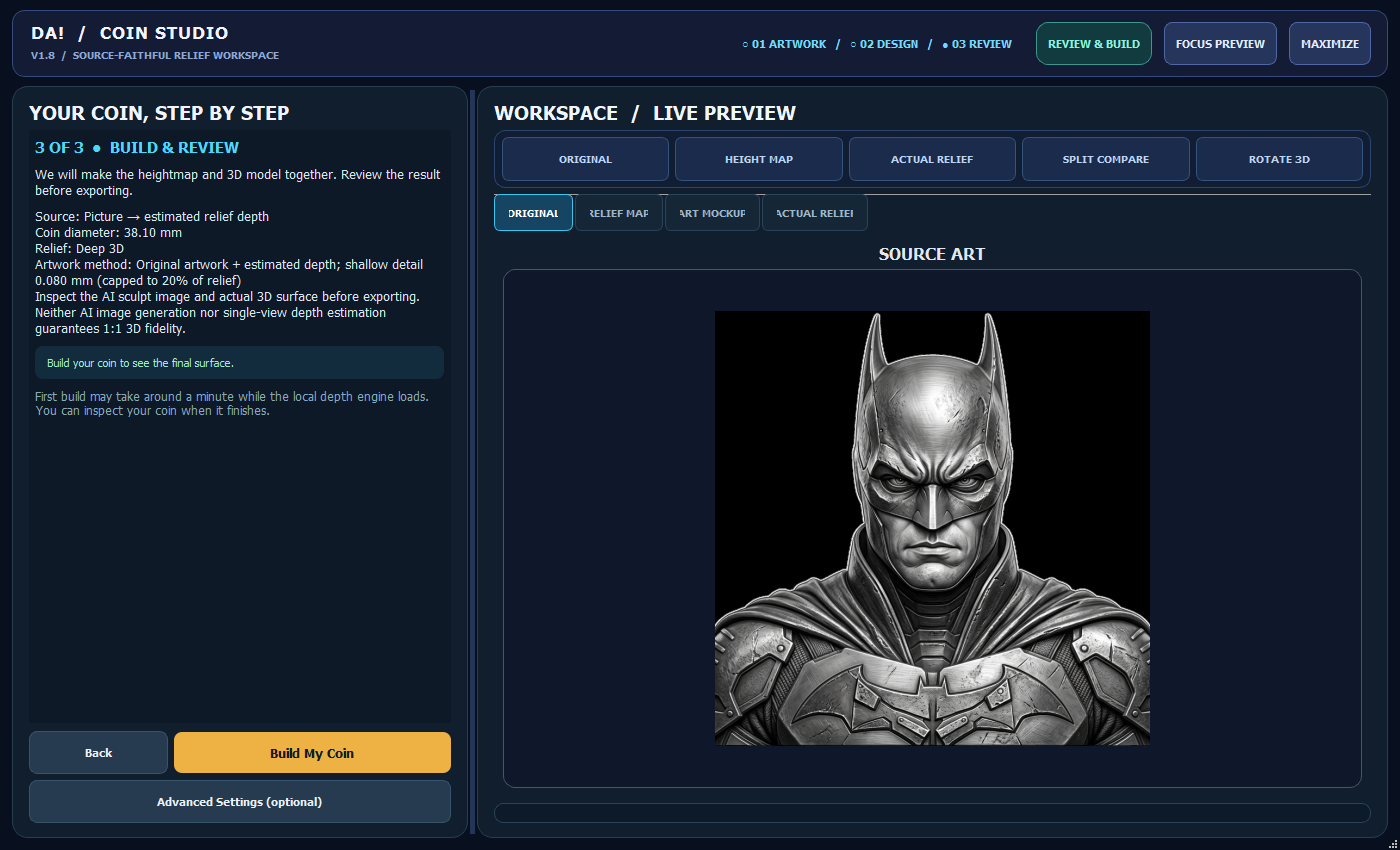
Checkpoint: The review describes the same source and physical size you chose.
STEP 05 / 06
Open RELIEF MAP and inspect the depth
After building, click the RELIEF MAP tab in Coin Studio, between ORIGINAL and ART MOCKUP. The preview heading changes to TRUE COIN HEIGHT MAP. This is the grayscale height/depth map—not the metallic coin mockup.
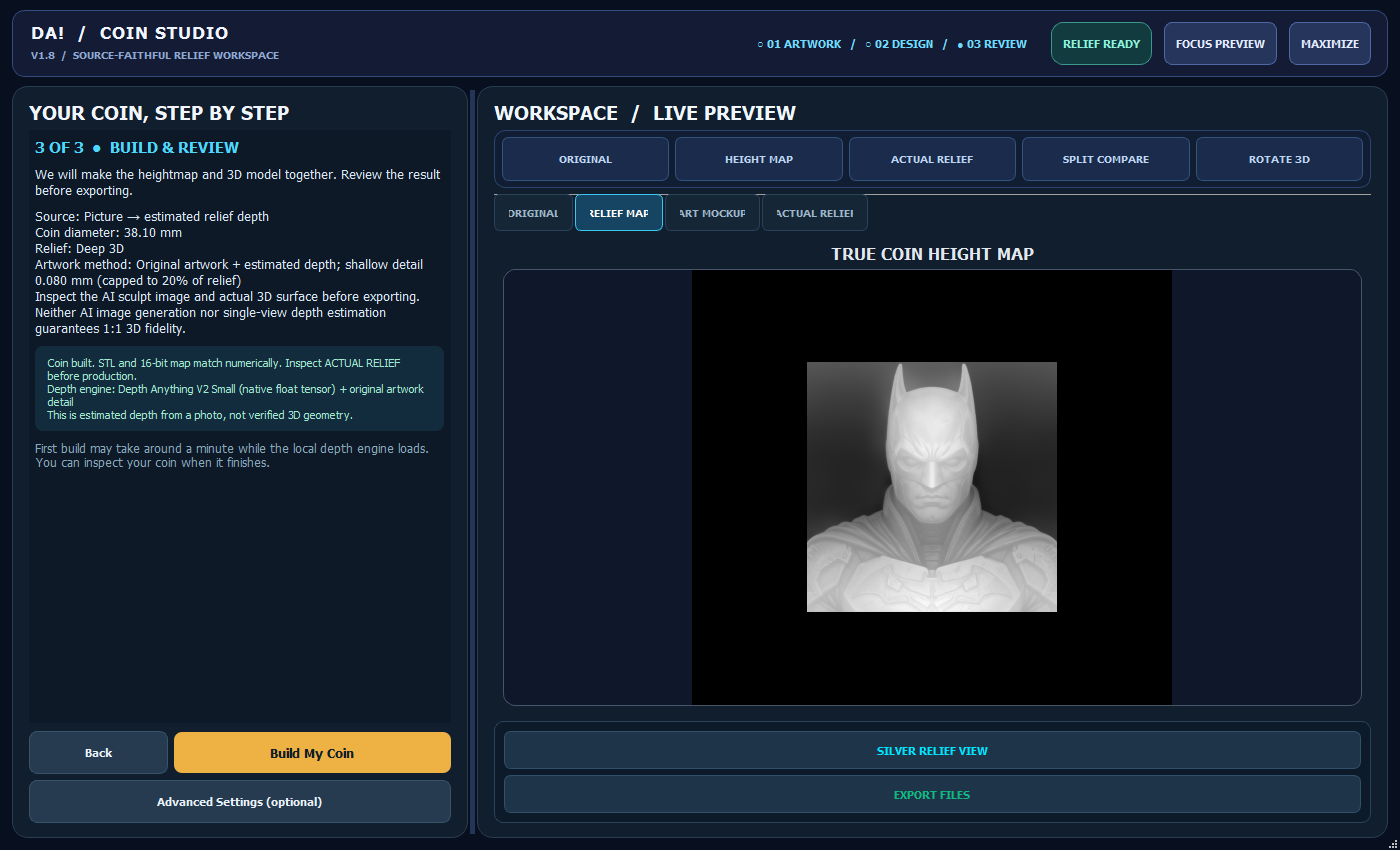
Inspect the height transitions around the face, fine features, subject edges and background. In the displayed positive map, lighter areas represent higher surface levels and darker areas lower ones. This map comes from estimated photo depth; it is not a measurement of the original subject. ART MOCKUP is for appearance; ACTUAL RELIEF shows the derived surface. Compare all three without confusing their roles. Use Split Compare and Rotate 3D to inspect the result. Check the eyes, nose, lettering, rim, background floor and silhouette. An ART MOCKUP shows a presentation treatment; inspect the actual surface before manufacturing. Return to Advanced Settings if you need to revise physical parameters.
Checkpoint: No unexpected spikes, clipped features or raised background areas remain in the actual relief.
STEP 06 / 06
Export for the process you will use
Click EXPORT FILES beneath the finished preview. In builds that show Export Coin Pack, use that control. Review the included files and their units. Mesh files such as STL/OBJ are for software that accepts geometry; height maps and raster slices follow their own machining or laser workflow. Confirm scale in the receiving software and prove a small sample before committing your final blank. Save the source and recipe with the project.
Checkpoint: The receiving program reports the intended diameter. You know which file drives the manufacturing operation.